
Build a Whistler Getaway Around the Mountain, Lakes and Village
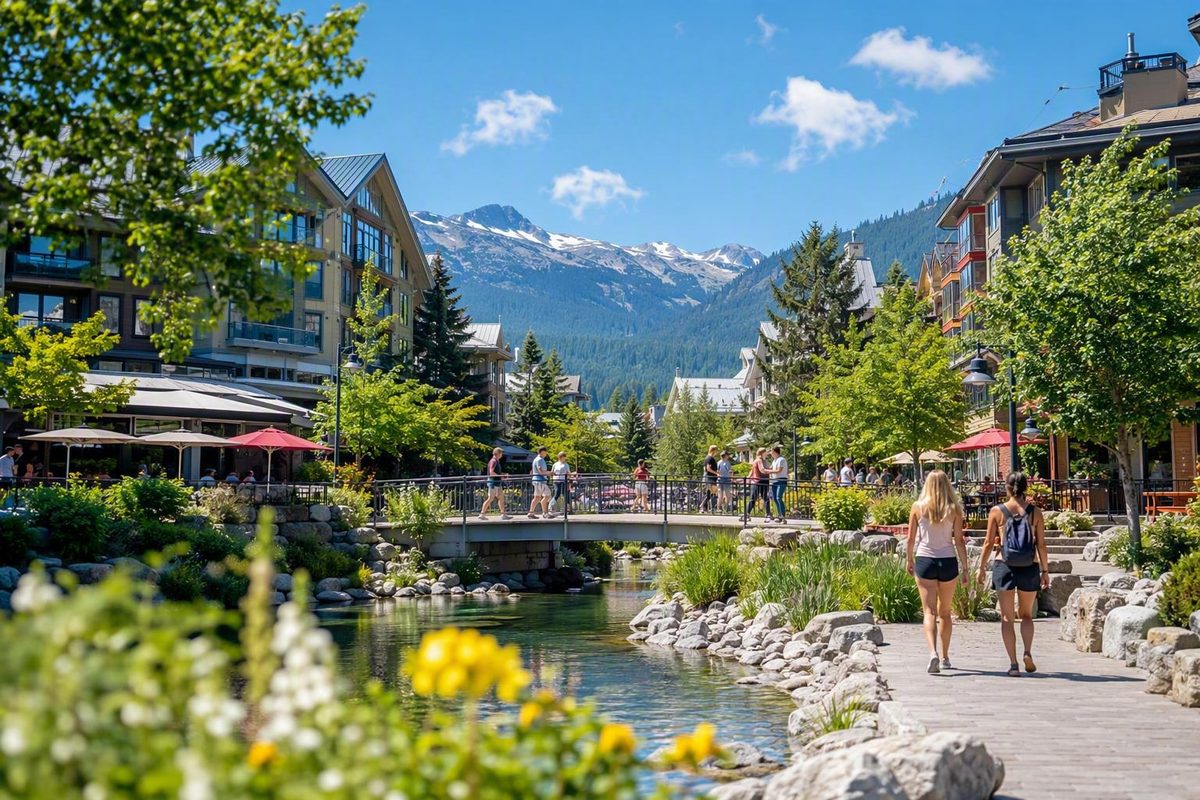
Whistler Village works best as the hub of a layered summer trip, not as a checklist to complete. Start with the pedestrian core, add a lake or Valley Trail outing, and reserve your main mountain experience for the day with the clearest suitable conditions.
That structure works for a one-, two- or three-day visit, whether you hike or not and whether you arrive from Vancouver by coach or car. The essential planning point is that “Whistler” includes several separate bases and mountain zones. The main Village, Upper Village, Creekside, Function Junction and the alpine are not interchangeable locations.
Use this access key throughout the guide:
- Village walk: Convenient from the main pedestrian core.
- Longer walk or bike: Connected to the Village, but not necessarily a short stroll.
- Local transit or operator shuttle: Check routes, operating dates, fares and reservation rules.
- Car or taxi useful: Helpful when destinations are dispersed or transit is inconvenient.
Summer operations are date-specific. Lift access, trail openings, events, rentals, transit and attraction hours should all be confirmed for the dates of your trip.
Start by Understanding What “Whistler Village” Includes
The main Whistler Village is the most convenient base for many first-time visitors. Accommodation, restaurants, shops, nightlife, activity services and mountain access points are concentrated around a pedestrian-oriented centre. The Village Stroll connects central amenities and areas near the lifts, allowing much of an ordinary day to unfold on foot. Tourism Whistler’s car-free planning guide describes the Stroll as linking hotels, restaurants, shops, activity centres and mountain access.
Within the main Village, it helps to distinguish Village Centre from Village North. The difference is primarily about where you want to begin and end your walks, not about needing transportation between the two areas.
Access: Village walk.
Upper Village is at the base of Blackcomb. It is within walking distance of the main Village for many visitors, but it has its own Blackcomb access, accommodation, restaurants, shops and cultural attractions. It may suit travelers who want to remain near the central resort while using a somewhat separate base. Lost Lake can also be approached from this side of Whistler.
Access: Village walk or longer walk, depending on your starting point and mobility.
Creekside is a separate base south of the main Village. It has accommodation, groceries, dining and lift access, as well as connections toward Nita Lake and Alpha Lake. It can make sense if those lakes or Creekside’s smaller base better match your plans, but a trip to the main Village normally requires cycling, local transit, a taxi or a car. A third-party comparison of Whistler’s three bases outlines those differences.
Access: Longer bike ride, local transit, taxi or car useful.
Function Junction is farther south and is not part of the central Village. Businesses and activities there require a deliberate trip. The same is true of the Train Wreck area, which lies outside the resort core. Train Wreck can fit into a longer itinerary, but it is not a quick extension of the Village Stroll.
Access: Local transit, bike, operator transportation, taxi or car useful.
The alpine is another distinct zone. A lift may begin near your accommodation, but the mountaintop environment is not an extension of the Village. Weather, trail access, clothing needs and operating hours can differ substantially at elevation.
Access: Lift ticket or activity booking; confirm the correct base and operating lifts.
For the broadest concentration of amenities, choose the main Village. Consider Upper Village for Blackcomb access and a separate base that remains close to the centre. Choose Creekside when its lakes, lift access or setting matter more than immediate access to the main Village Stroll.
A quick access summary:
| Destination or activity | Typical access from the main Village |
|---|---|
| Village Stroll and Olympic Plaza | Village walk |
| Upper Village cultural attractions | Village walk |
| Lost Lake | Longer walk or bike |
| Creekside, Nita Lake and Alpha Lake | Longer bike, local transit, taxi or car useful |
| Function Junction and Train Wreck | Local transit, operator shuttle, taxi or car useful |
| Whistler and Blackcomb alpine | Lift access; verify the operating base and product |
| Guided rafting, motorized or wildlife tours | Operator transportation or car may be useful |
Explore the Village Before Adding a Major Activity
Do not treat Whistler Village only as a waiting room for gondolas and tours. A relaxed first circuit helps you understand the layout while leaving room for a meal, cultural stop or lake visit.
Begin near the lift plazas, follow the Village Stroll through its café and shopping areas, and continue toward Whistler Olympic Plaza. Stop for coffee, browse shops or galleries, look for public art, or take a patio break. This works especially well on an arrival afternoon, when committing to a tightly timed excursion could make the day feel rushed.
Olympic Plaza is a public gathering space, not a guaranteed performance venue. Concerts, festivals and other events may take place there, but visitors should confirm the event calendar, start time, admission arrangements and weather policy for their exact dates.
Dining, shopping, art, nightlife and wellness are legitimate parts of a Whistler summer trip. A non-hiker can build an afternoon around a museum, shopping, a wellness appointment and dinner. Couples might combine a slow Village circuit with a reserved meal, while families may prefer an open public space, an early dinner and one manageable attraction.
Three cultural options serve different purposes:
- Whistler Museum: Focuses on Whistler’s history and mountain culture.
- Audain Art Museum: An art-focused indoor option near the Village.
- Squamish Lil’wat Cultural Centre: Presents the art, history and culture of the Squamish and Lil’wat Nations near Upper Village.
The Squamish Lil’wat Cultural Centre should not be treated as a generic local museum or a brief weather shelter. Allow time to engage with the available exhibitions and programming.
Access: Whistler Museum and Audain Art Museum are Village walks from much of the central area. The Squamish Lil’wat Cultural Centre is a Village walk or longer walk, depending on your starting point.
A Village circuit is strongest when paired with one anchor: a museum, cultural visit, wellness appointment, substantial meal, lake walk or verified event. Browsing alone may not fill a satisfying full day for every visitor.
Restaurant availability, event schedules, museum hours and admission arrangements can change. If a venue is important to your trip, check its current schedule and reservation policy before arrival.
Choose One Mountain Experience for the Best-Weather Day
For a first-time visitor who wants alpine scenery without making a strenuous hike the central objective, PEAK 2 PEAK sightseeing is the broadest mountain option. The gondola connects Whistler and Blackcomb mountains, giving visitors access to both sides when the relevant base lifts and connecting service are operating.
Access: Lift access from the base named on your ticket; verify where to begin.
Do not assume that a sightseeing ticket includes every gondola, chairlift, bridge, viewpoint or trail. Products and operations vary by date. Before buying, confirm:
- Which mountain base to use
- Which gondolas and chairs are operating
- Whether PEAK 2 PEAK is running
- Which viewpoints and attractions are accessible
- Whether lift download is included or required
- Final upload, connection and download times
- Whether the trail or bridge you want to visit is open
Whistler Blackcomb advertises more than 50 kilometres of high-alpine hiking trails, but that figure describes the wider network rather than a guarantee that every route will be open. Snow, weather, maintenance and seasonal operations can restrict access. The resort’s summer activity overview also identifies PEAK 2 PEAK as the connection between Whistler and Blackcomb.
When conditions and operations permit, a mountain day can include short walks, viewpoints or the Cloudraker Skybridge area. Treat these as possible additions rather than automatic ticket inclusions. Visitors who are uncomfortable with heights or exposed settings should assess each attraction separately.
A practical sightseeing day has three layers:
- Ride and look: Use operating gondolas and viewpoints without committing to a substantial hike.
- Add a short walk: Select a currently open route that suits your time, footwear and comfort with the terrain.
- Return for a meal or Village evening: Avoid turning sightseeing into an endurance schedule unless that is your goal.
Alpine sightseeing and downhill mountain biking are separate products. The Whistler Mountain Bike Park is a specialized lift-served environment. Riders should verify the appropriate bike, equipment, lesson options, ability expectations, route selection and operating zones directly with the resort or rental provider.
More demanding options include ziplining, Via Ferrata, glacier experiences, rafting, bear-viewing tours, ATV or UTV outings and helicopter sightseeing. Treat these as reserved upgrades rather than activities to add casually after arriving. Confirm the check-in point, transportation, duration, cancellation terms and current participant requirements.
Access: These activities may require operator transportation, a local shuttle, taxi or car, depending on the meeting point.
Wildlife tours may create an opportunity to observe bears, but sightings are never guaranteed. Follow the tour operator’s current instructions and do not judge the value of the trip solely by whether an animal appears.
The most useful scheduling rule is simple: place your priority mountain activity on the clearest suitable day, but understand the ticket’s change, cancellation and weather terms before paying.
Use Lost Lake and the Valley Trail for a Lower-Cost Outdoor Day
Lost Lake is the most straightforward lake outing from the main Village or Upper Village. Multiple visitor guides describe it as reachable on foot or by bike, with beach or swimming time and nearby walking and mountain-biking routes among the possible summer activities. The local travel guide Happiest Outdoors also describes access from the Village by walking or seasonal shuttle.
Access: Longer walk or bike; a seasonal shuttle may operate on selected dates.
Facilities, water conditions and seasonal services can vary. Check current park information and follow posted rules rather than assuming rentals, supervision, changing facilities or a particular swimming area will be available.
The Valley Trail is the organizing feature for a ground-level outdoor day. It is a paved, multi-use network connecting Whistler neighbourhoods, parks and lakes. Visitors can walk, run or cycle selected sections instead of trying to complete the entire system.
Published descriptions disagree about the Valley Trail’s total length, so one definitive figure is less useful than its role as a connector. Plan around a destination, turnaround point and return time.
Because the trail is shared, expect walkers and cyclists, travel at a speed appropriate to the surroundings, and follow posted directions and activity restrictions. Rental providers can advise whether a particular bike is suitable for the route you intend to use.
Lost Lake is not the only water option. Alta Lake, Green Lake, Nita Lake and Alpha Lake broaden the possibilities for picnics, paddling, swimming and cycling, but they are not equally close to the main Village.
Alta Lake and Green Lake generally require a more deliberate Valley Trail outing or transportation plan. Nita Lake and Alpha Lake pair more naturally with Creekside. If paddling is the priority, identify the launch point and rental provider before traveling; equipment availability should not be assumed at every lake.
Access:
-
Lost Lake: Longer walk or bike from the main Village or Upper Village.
-
Nita Lake and Alpha Lake: Most naturally reached from Creekside; use a bike, local transit, taxi or car from the main Village.
Possible warm-weather activities include canoeing, kayaking, stand-up paddleboarding, recreational cycling and guided e-bike tours. Availability depends on the operator, water and weather conditions, and time of season. Confirm equipment, instruction, meeting points and operator requirements before booking, then follow posted and operator rules.
For a lower-cost day, combine a Village walk, picnic, Valley Trail segment and Lost Lake. Disc golf near Lost Lake is another possible no-admission activity, while public concerts or events may be free on eligible dates. A commercial accommodation provider’s budget guide describes the disc-golf course as free, but seasonal access and event schedules still require confirmation.
A lake-and-trail day is not merely a fallback for visitors skipping gondola tickets. It may be the better option when mountain visibility is poor, the group wants flexible timing or the budget allows only one major paid activity.
Match the Day to Your Group, Energy and Weather
Instead of asking which Whistler attraction is universally “best,” place your group in one of four planning lanes. You can change lanes as weather, energy or confidence changes.
1. Easy sightseeing
Combine the Village Stroll with one or two low-commitment stops: a café, museum, cultural venue, operating gondola or short lake visit. This lane suits non-hikers and visitors who want mountain scenery without structuring the entire trip around exertion.
A sensible sequence is breakfast, Village exploration, gondola sightseeing during the clearer part of the day, and then a patio or cultural stop. If mountain visibility is poor, reverse the plan or substitute a Village-level activity.
2. Active but non-technical recreation
Consider recreational cycling on the Valley Trail, walking to Lost Lake, swimming or paddling when available, or selecting a currently open short alpine walk. Choose by current surface, distance, elevation and exposure rather than relying on an unsupported “easy” label.
A Valley Trail rental day and a bike-park day are not equivalent. Tell the rental provider exactly where you plan to ride so the equipment and advice match the intended route.
3. Reserved adventure
Downhill biking, ziplining, rafting, Via Ferrata, glacier experiences and motorized tours belong in this lane. They require more planning and may be affected by weather, transport arrangements and participant rules.
Before booking, confirm directly with the operator:
- Age, height or weight conditions
- Fitness and mobility expectations
- Driver’s-licence rules, if relevant
- Required footwear and clothing
- Supplied or required equipment
- Adult-supervision conditions
- Transportation and check-in location
- Cancellation and rescheduling terms
Do not infer suitability from promotional photographs. Current operator rules and the individual participant’s comfort level are more useful.
4. Indoor or weather-flexible activities
For rain, cold, smoke or poor alpine visibility, consider the Squamish Lil’wat Cultural Centre, Audain Art Museum, Whistler Museum, recreation facilities, cafés, shops, restaurants and wellness appointments.
Indoor venues still have operating hours, capacity limits and possible reservation requirements. Check before relying on one as a same-day replacement. If wildfire smoke is present, consult current public-health and local guidance before deciding how to spend the day outdoors.
Families can draw from all four lanes. Gondola sightseeing, lake time, recreational cycling, treetop experiences, Train Wreck Trail and Vallea Lumina may all be possibilities, but none is a universal family recommendation. Darkness, bridges, uneven terrain, water, heights, distance, weather and operator restrictions can change suitability.
The same caution applies to accessibility. “Walking distance” does not establish that a route works for every wheelchair user, stroller or person with limited mobility. Paved routes may still include slopes, crowds, mixed traffic or weather exposure. Ask the venue or operator for current route-specific information.
Follow a One-, Two- or Three-Day Summer Plan
A useful Whistler summer itinerary leaves room to respond to conditions. Trying to fit a gondola, long hike, lake circuit, cultural venue and evening attraction into one day usually creates more transit and clock-watching than enjoyment.
One day: mountain priority
- Begin with breakfast and part of the Village Stroll.
- Use the clearest suitable portion of the day for PEAK 2 PEAK or another operating sightseeing product.
- Return to Village level and choose either Lost Lake or a cultural stop.
- Finish with dinner, allowing enough time to reach your accommodation or return coach.
This plan makes one paid, weather-sensitive experience the priority while keeping everything else flexible.
One day: ground-level alternative
If lifts are closed, alpine access is limited or visibility is poor:
- Walk from the lift plazas through the Village Stroll to Olympic Plaza.
- Visit the Audain Art Museum, Whistler Museum or Squamish Lil’wat Cultural Centre.
- Walk or cycle a manageable Valley Trail segment.
- Continue to Lost Lake if time and conditions suit.
- Return for dinner or a verified event.
Do not force a mountain ticket into a day when the experience you want is unavailable. A cultural-and-lake itinerary can still show how Whistler’s Village and valley fit together.
Two days: one mountain day and one valley day
On day one, use the best available weather window for PEAK 2 PEAK sightseeing or another reserved mountain activity. Add a short open walk or viewpoint only if time and conditions allow.
On day two, remain at valley level. Rent recreational bikes, walk part of the Valley Trail, spend time at a lake or reserve a paddling activity. Add a museum or the Squamish Lil’wat Cultural Centre so the day is not entirely dependent on outdoor conditions.
This structure is particularly effective for a first visit: one day establishes the scale of the mountains, while the other shows how the neighbourhoods, parks and lakes connect.
Three days: add one specialized experience
Keep the mountain-and-valley structure, then use the third day for one focused activity:
- Downhill mountain biking
- Ziplining
- Rafting
- Train Wreck Trail
- Vallea Lumina
- A guided cultural, hiking, paddling or motorized tour
Choose one rather than stacking several costly reservations. Check-in, transportation and equipment arrangements can occupy additional time around the advertised activity.
For Train Wreck, remember that the trail area is south of central Whistler. Treat it as a separate outing and confirm the route and transportation rather than assuming it begins near the Village.
Access: Local transit, bike, taxi or car useful, depending on the route selected.
Budget variation
Build the day around the Village Stroll, public art, Olympic Plaza, the Valley Trail, Lost Lake and disc golf. Add Whistler Museum if its current admission arrangement fits your budget, and check for eligible public events. Picnic provisions can replace one restaurant meal.
A no-admission activity does not make the whole trip inexpensive. Accommodation, food, transportation and rentals may still be substantial, so choose in advance which paid experience matters most.
Low-intensity variation
Use the Village as the main event. Plan a café breakfast, an operating sightseeing ride, an unhurried lunch, lakeside time, a museum, shopping or a wellness appointment. Reserve dinner if a particular time or dining style matters.
Organize meals by function rather than rankings:
- Quick breakfast before a lift or tour
- Picnic provisions for a lake or trail day
- Patio break between activities
- Reserved dinner after returning from the mountain
Avoid placing two expensive, weather-dependent mountain activities back-to-back unless both have flexible change terms. Keep a day or half-day open so a delayed mountain plan does not displace the rest of the trip.
Arrive and Get Around Without Defaulting to a Car
Coach and shuttle services connect downtown Vancouver or Vancouver International Airport with Whistler. Operators, stops, schedules, luggage policies, fares and journey times differ, so compare the actual service offered for your travel dates rather than choosing by an old headline price.
Book ahead during busy periods, especially when a flight arrival leaves only one practical connection. Match the Whistler drop-off point to your accommodation. Arrival near the main Village is less convenient if you are staying in Creekside and your onward local connection has finished for the evening.
For a trip focused on the main Village, Upper Village, mountain lifts, Lost Lake and selected nearby attractions, a car is generally unnecessary. The local toolkit includes:
- Walking within the pedestrian core
- Cycling on connected routes
- Local buses
- Village or seasonal shuttles
- Taxis
- Transportation supplied by an activity operator
Claims that “transit is free in summer” need qualification. No-admission service may apply only to particular routes, dates, weekends, holidays or eligible passengers. Tourism Whistler describes seasonal car-free options, not a guarantee that every local bus is always free.
A vehicle becomes more useful when an itinerary includes dispersed trailheads, several stops along the Sea to Sky corridor, activities without practical pickup options or travel beyond the resort. It can also help with substantial equipment, although parking arrangements then become part of the plan.
Drivers can investigate central day lots and hotel parking, but rates, restrictions and availability are changeable. Check with the parking operator or accommodation rather than relying on a historical daily rate.
Walking distance is not the same as practical accessibility. A route that looks short on a map may include slopes, mixed bicycle-and-foot traffic, poor weather or an inconvenient surface. Luggage can make an otherwise reasonable walk less practical. Before booking a car-free stay, examine the route between your arrival stop, accommodation and priority activity.
If you want scenic stops between Vancouver and Whistler, compare the flexibility of driving with the simplicity of a direct coach. A car provides more control over stops; a coach avoids the need to park and allows the Village to function as a genuinely walkable base.
Check Conditions, Pack for Elevation and Reserve the Right Pieces
A warm forecast for Whistler Village does not describe the alpine. Higher elevations can be colder, windier and more changeable than the valley. Whistler Blackcomb’s vacation-planning guidance likewise notes that conditions vary with elevation and that the summit is colder than the Village.
Choose clothing and personal supplies for the activity and current forecast. A practical summer kit may include:
- Layers that can be added or removed
- A weather-resistant outer layer
- Sun protection
- Water
- Footwear appropriate to the chosen surface
- Personal medication or equipment you normally require
This general list does not replace trail information or an operator’s instructions.
Early summer requires particular flexibility. Lingering snow may remain visible while also delaying or restricting alpine hiking. A gondola can be operating even when a specific trail is closed, so confirm trail status separately from lift status.
Pre-departure verification checklist
Shortly before leaving Vancouver, check:
- Gondola, chairlift and PEAK 2 PEAK operations
- Alpine and valley trail status
- Bike-park zones and upload arrangements
- Museum and attraction hours
- Wildfire, smoke and air-quality information
- Event dates and weather policies
- Local buses and seasonal shuttles
- Lake, swimming and paddling information
- Operator pickup points and check-in times
Use the responsible operator, venue or public authority for each check. Tourism Whistler’s summer activity directory is a useful starting point for identifying activities, but final eligibility, timing and operational details should come from the provider responsible for the service.
Advance-booking checklist
Reserve the fixed pieces that could disrupt the trip if unavailable:
- Accommodation
- Vancouver–Whistler transportation
- Priority gondola or sightseeing products
- Guided tours
- Bike or paddling rentals
- Popular dinner times
- Reservation-only evening experiences
- Activities with limited transportation or equipment capacity
Do not use historical blog prices as a current budget. Attraction prices, discounts, parking charges, shuttle fares and admission arrangements can change. Confirm the final price, taxes, cancellation terms and inclusions before purchase.
Keep the planning rule straightforward: book the fixed pieces, preserve flexibility for the weather-sensitive mountain day, and retain one Village-level indoor or lake-level alternative.
Frequently Asked Questions
Do I need a car in Whistler Village during summer?
Usually not. If you stay in the main Village or Upper Village and focus on the pedestrian core, lifts, Lost Lake and nearby attractions, you can combine walking, cycling, buses, taxis and operator transportation.
A car may be useful for dispersed trailheads, Sea to Sky stops, activities without shuttles or a broader regional trip. Creekside also requires more transportation planning when most of your activities are in the main Village. Confirm current service times and fares rather than assuming every bus or shuttle is free.
How many days should I spend in Whistler Village in summer?
One day is enough for the Village and one priority experience. Two days allow a balanced mountain day and valley or cultural day. Three days create room for a specialized activity such as downhill biking, ziplining, rafting, Train Wreck or Vallea Lumina.
For many first-time visitors, two or three days also reduce the pressure to complete a weather-sensitive mountain activity on a fixed date.
Can I walk from Whistler Village to Lost Lake?
Yes. Lost Lake is commonly approached on foot or by bike from the main Village and Upper Village. The practical distance and effort depend on your starting point and selected route, so check a current map and allow time for the return.
Do not assume that “walkable” means the route suits every mobility need. Ask for current route information if slopes, surfaces, mixed traffic or distance could affect your plans.
What can I do in Whistler Village when it rains or the mountains have poor visibility?
Consider the Squamish Lil’wat Cultural Centre, Audain Art Museum, Whistler Museum, cafés, shops, restaurants, wellness appointments or an operating recreation facility. A Valley Trail walk or Lost Lake visit may also work when conditions at valley level remain suitable.
Check opening hours and reservations before changing plans. Poor visibility can reduce the appeal of alpine sightseeing even when some lifts continue to operate.
Are the gondolas and alpine hiking trails open throughout summer?
Not necessarily. Gondolas, chairs, PEAK 2 PEAK service, bike-park zones and alpine trails can have different operating periods. Snow, weather, maintenance and seasonal decisions may also affect individual trails and attractions.
Check every lift and trail you intend to use before purchasing. Early in the season, sightseeing access may be available while some alpine hiking remains limited.
Reduce the trip to three decisions: choose the Village area that matches the atmosphere and access you want, reserve one priority mountain or adventure experience, and leave room for a lake, cultural venue or weather backup. Whistler Village makes a car-light summer trip practical, but the successful version depends on distinguishing the resort’s separate districts and checking current operations before travel.