
A Camera-Ready Route Through Vancouver’s Forest and Waterfront
Allow about one hour as a suggested planning window for a focused photography shoot at either Brockton Point or Lost Lagoon.
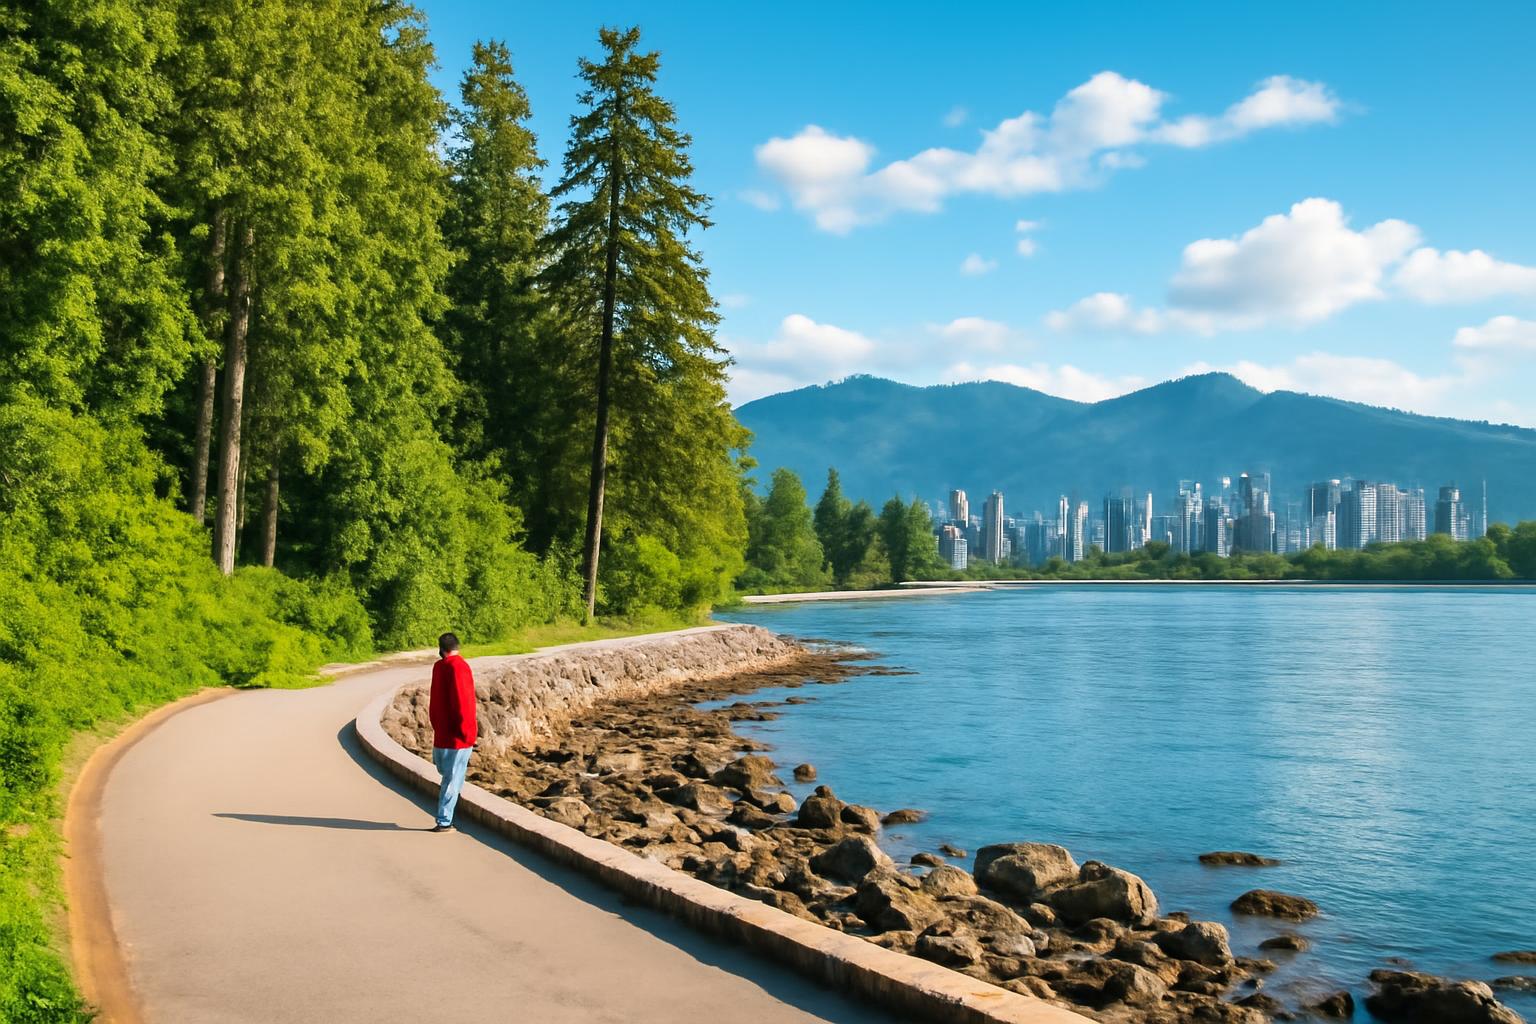
Start Here: This Is Stanley Park in Vancouver
This Stanley Park photography guide covers Stanley Park in Vancouver, British Columbia. It does not cover Stanley Park in Westfield, Massachusetts. The parks have different facilities, landscapes, and rules, so portrait policies or fees associated with the Massachusetts park must not be applied to Vancouver.
Vancouver’s Stanley Park is most useful to photographers when treated as a group of distinct shooting zones rather than a checklist of attractions. The park covers roughly 400 hectares and includes a paved 9-kilometre Seawall, more than 27 kilometres of forest trails, beaches, gardens, wildlife habitat, monuments, viewpoints, and First Nations artworks.1
That variety is the park’s central photographic advantage. A single visit can combine downtown skyline, harbour, mountain, bridge, lighthouse, shoreline, beach, forest, garden, artwork, and possible wildlife subjects. The same route-planning principles apply whether you use a phone, compact camera, or interchangeable-lens camera.
What the park cannot provide is certainty. Weather can obscure the mountains or transform the shoreline. Gardens do not bloom on a fixed date, autumn colour varies, viewpoints can be busy, and wildlife may never appear. A beach identified for sunset viewing does not guarantee visible sun or colourful clouds. Treat this as a planning guide, not a promise of particular conditions.
For a quick decision:
- Choose Brockton Point for a compact mix of recognizable artworks, lighthouse, harbour, skyline, and mountain subjects.
- Choose Prospect Point and the western Seawall for Lions Gate Bridge, passing ships, exposed shoreline, and broad coastal scenes.
- Choose Lost Lagoon or Beaver Lake for reflections, vegetation, quieter observation, and possible wildlife.
- Choose Second Beach, Third Beach, or English Bay when sunset is the central aim.
- Choose one designated interior trail when forest texture, moss, foliage, or environmental portraiture matters more than landmarks.
This guide uses the City’s official 9-kilometre measurement for the Stanley Park Seawall. Examine the route behind the number rather than assuming every itinerary covers identical ground.
The Main Waterfront Photography Stops
The waterfront is easiest to photograph as a sequence, with stops selected according to your available time and preferred subjects. The City guide describes the Seawall route as counter-clockwise, with separated pedestrian and cycling areas, but temporary signs, closures, and on-site directions should always control your route.2
Hallelujah Point
Principal subject: city and water views.
Supporting elements: large trees, shoreline edges, boats, clouds, and downtown buildings.
Best fit: a short introduction near the eastern side of the park or an opening stop before Brockton Point.
A third-party photography itinerary recommends using two large trees at Hallelujah Point to frame the water and city.3 That is a composition suggestion, not an official scenic designation or a guarantee that the foreground will be clear.
Decide what controls the frame instead of trying to include everything. Trees can provide depth, water can create negative space, or the skyline can become the main geometric subject. Passing path users may make a carefully balanced composition temporary, so work without obstructing the route.
Brockton Point
Principal subjects: First Nations artworks, Brockton Point Lighthouse, harbour, and downtown skyline.
Supporting elements: mountains, working-port activity, open water, shoreline, and passing vessels.
Best fit: a short standalone shoot or the beginning of a longer waterfront route.
Brockton Point is the article’s recommended starting point for a first visit because several documented subject types sit within a relatively compact zone. You can move from cultural works to harbour context and then look for skyline, mountain, shoreline, and lighthouse compositions without attempting the full park.
The current Brockton Point Lighthouse dates to 1914.4 Depending on conditions, isolate the structure against water and sky or include more of the harbour to explain its setting.
The First Nations works at Brockton Point should be approached as identifiable cultural works, not interchangeable decoration. The City guide attributes works in this area to artists including Susan Point, Robert Yelton, and Luke Marston. If you photograph a particular pole, portal, memorial, or sculpture, record enough information to identify the work accurately later. Fuller guidance appears in the responsible-photography section.
Brockton Point supports broad environmental images as well as tighter studies of form, material, and relationship to place. Its compact subject variety can also attract tour groups, cyclists, and visitors taking quick photographs. Waiting for a clear moment or simplifying the background is more considerate than asking strangers to clear a public space.
Prospect Point and Lions Gate Bridge Views
Principal subjects: Lions Gate Bridge, harbour, North Shore, mountains, and passing ships.
Supporting elements: forest edges, water, bridge structure, clouds, and marine traffic.
Best fit: a half-day or longer route, especially when bridge and harbour views are priorities.
Prospect Point is a lookout zone rather than one compulsory camera position. Third-party material distinguishes the main lookout, a lower platform, and shoreline perspectives from the Seawall.5 Each changes the relationship among the bridge, water, ships, and mountains; none is objectively best.
A higher or more open view can explain the geography, while a lower perspective can give the bridge greater visual weight. From portions of the Seawall, foreground water or coastal vegetation can make the image feel less like a conventional overlook. Lions Gate Bridge—also officially called First Narrows Bridge—is therefore available from more than one perspective.
First decide whether you want a bridge portrait or a broader harbour scene. A clean bridge composition depends on visibility and a workable background. An environmental frame can incorporate haze, vessels, changing clouds, and mountain layers. Passing ships can add scale, but their arrival should not be assumed unless you independently check current marine movements.
Weather can feel more exposed, and cloud or haze may remove the mountain background entirely. Leave enough time to observe the scene rather than arriving with only a few minutes available.
Siwash Rock
Principal subject: the offshore rock-and-tree form.
Supporting elements: open water, distant shoreline, waves, cloud layers, weather, and coastal vegetation.
Best fit: a half-day waterfront route or a transition toward Third Beach.
Siwash Rock works because the subject is visually distinct while remaining strongly connected to its coastal setting. A simplified composition emphasizes shape; a wider frame can show the scale and atmosphere of English Bay. Rain, mist, hard sun, and broken cloud will produce different images, none inherently wrong.
Remain on maintained public routes. Do not climb shoreline rocks or assume that a visible surface is safe or publicly accessible. This guide does not verify tide-dependent access, wave conditions, temporary restrictions, or shoreline stability for a particular visit. A less dramatic position is preferable to habitat damage or a fall.
Many visitors pause at the same visual opening. Keep bags and bodies clear of travel lanes, take turns where space is constrained, and avoid spreading equipment across the path.
The Western Beaches and English Bay
Principal subjects: open water, beach activity, layered shoreline, and sunset sky.
Supporting elements: silhouettes, driftwood, waves, clouds, distant vessels, and coastal trees.
Best fit: an evening endpoint, although each beach can also support an independent short shoot.
English Bay, Second Beach, and Third Beach are identified by the City as sunset-viewing locations.2 They are broad zones rather than fixed tripod marks, and that flexibility is part of their value. Water and sky can dominate, a person can provide scale, or the foreground shoreline can anchor the scene.
The designation does not promise a clear horizon, a particular solar alignment, or colourful clouds. Arrive early enough to assess both the light and the usable public space.
Third Beach is a natural endpoint after Siwash Rock. Second Beach pairs more easily with Lost Lagoon or nearby interior plans, while English Bay can provide a convenient finish toward the West End. Choose the location that supports your route and return transportation instead of trying to collect every shoreline stop.
Summer evenings may be busy. Use conservative judgment around waves, wet surfaces, and slippery edges, and remain within established public areas. Another photographer’s position may have been made under different weather, access, or shoreline conditions.
Lost Lagoon, Forest Trails, Gardens, and Wildlife Habitats
Lost Lagoon is a convenient alternative—or complement—to the landmark-heavy Seawall. It can support photographs of water, shoreline trees, reflections, vegetation, mountains, and nearby urban context without requiring a complete waterfront loop. It is particularly useful when the aim is to slow down and wait for relationships among light, water, and movement.
One professional photographer documented evening-lit shoreline trees and a great blue heron at Lost Lagoon.6 That example demonstrates the range of possible subjects, not a reliable wildlife-sighting plan. Reflections, tree shapes, or changing surface texture may be stronger subjects on your visit.
Beaver Lake shifts the visual language farther inward. Its appeal lies in the interaction of water, wetland vegetation, forest, and understory rather than one dominant landmark. Leaf patterns, bark, layered branches, surface texture, and transitions between open water and dense growth can matter more than a grand vista.
The park’s documented forest includes Douglas fir, western red cedar, western hemlock, Sitka spruce, and bigleaf maple.2 These species help describe the forest’s ecological character, but they do not guarantee a particular tree at the exact place where you stop. Avoid definitive botanical captions when you are unsure of an identification.
Rawlings Trail, Cathedral Trail, and Ravine Trails are interior route examples mentioned in the supplied park and travel material. Treat them as options, not promises of solitude, current surface quality, or universal step-free access. Select one designated trail that fits your time and mobility rather than moving among several in search of a supposedly secret scene.
The Rose Garden and rhododendron garden introduce seasonal colour. The City places rhododendron bloom from March into early summer and says the gardens are generally showiest from April through September.2 These are broad planning windows, not bloom forecasts. Temperature, rainfall, maintenance, and the date of your visit will affect what is visible.
Wildlife habitat is not a wildlife guarantee. Animals mentioned across the supplied sources include herons, waterfowl, turtles, seals, raccoons, beavers, and coyotes. Do not use those examples as precise sighting directions, and never follow an animal after it moves away.
When rain or poor visibility weakens a shoreline plan, Lost Lagoon reflections, saturated foliage, forest details, and mist may provide alternatives. That is route-planning logic, not a weather forecast. The interior is not automatically dry or sheltered, but it offers closer subjects when mountains and sunset colour disappear.
Choose this zone when patient observation and environmental detail matter more than immediately recognizable Vancouver landmarks. Choose Brockton Point or Prospect Point when skyline, lighthouse, bridge, or harbour imagery is the priority.
When to Go: Light, Crowds, and Seasonal Subjects
Seasonal advice in Stanley Park must remain flexible. Vancouver weather, flower timing, autumn colour, snowfall, sunset visibility, and animal activity can change substantially between dates and years. Plan around a type of subject, then confirm current conditions shortly before leaving.
Early morning is the most consistently repeated third-party recommendation for lighter Seawall crowds.7 It is a useful tendency, not a guarantee. Runners, events, tour groups, maintenance, or unusually good weather can change path activity.
Late afternoon and evening suit waterfront light and sunset plans, but summer evenings may remain busy. Arrive with enough time to move safely to a fallback location. Reaching a beach only as the light changes can leave no practical alternative if the path is crowded or shoreline conditions are unsuitable.
English Bay, Second Beach, and Third Beach are the City’s listed sunset-viewing areas.2 That supports choosing them for an evening plan, but not predicting where the sun will sit in a particular frame or whether the clouds will develop colour.
| Season | Likely photographic emphasis | Planning limits |
|---|---|---|
| Spring | Rhododendrons, blossoms, bulbs, wet surfaces, and fresh foliage | Bloom timing varies; check current garden conditions rather than relying only on the calendar |
| Summer | Broad garden displays, long evenings, beaches, waterfront activity, and mountain views when clear | Paths and beaches can be busy; haze may reduce distant detail |
| Autumn | Variable foliage, leaf detail, reflections, and seasonal light | Timing and colour differ by species, location, weather, and year |
| Winter | Rain, mist, shoreline weather, bare structure, and occasional snow | Snow is not dependable; short days and wet surfaces can constrain the route |
Cherry blossoms and autumn foliage have been documented by photographers and local travel writers, but neither should be treated as a fixed park-wide event. A tree that performed strongly one year may peak on a different date—or look entirely different—during your visit.
Winter can still support a varied session. One January engagement shoot combined a fern-covered forest, skyline, lighthouse, mountains, and an unexpected colourful sunset.8 That session demonstrates how several environments can be combined; it does not establish typical January weather.
Fallback plan
Choose one primary outdoor subject and one nearby alternative before leaving:
- Third Beach sunset + Lost Lagoon reflections
- Prospect Point bridge view + forest details
- Brockton Point skyline + nearby artworks and lighthouse
- Garden colour + a manageable Seawall segment
Keep the alternatives close enough that changing plans does not require racing across the park.
Avoid planning from generic golden-hour schedules alone. Check the sunset time, current weather, and route status for your date. No weekday, sunrise, or evening hour can be promised to be empty.
Three Self-Guided Routes for One Hour, Half a Day, or a Full Day
A successful photography route is selective. Travel time, changing weather, waiting for people to pass, and examining compositions make a photography outing slower than an ordinary walk or ride.
One hour: choose one compact zone
Treat one hour as a suggested planning window, not an established tour duration. Choose Brockton Point or Lost Lagoon instead of attempting the full park.
At Brockton Point, begin with the First Nations works, continue toward the harbour and skyline views, and finish with the lighthouse. This sequence produces a broad mix of documented subject types—art, architecture, water, city, port, mountains, and shoreline—within one compact area.
At Lost Lagoon, concentrate on water, reflections, vegetation, city context, and possible birds. Walk slowly enough to notice where tree shapes or open water create a cleaner frame. If wildlife never appears, the area still supports landscape and detail photographs.
Brockton Point is the stronger choice for recognizable Vancouver subjects. Lost Lagoon supports slower work that is less dependent on landmarks.
Half a day: Brockton Point to the western shore
Begin around Brockton Point, allowing time for the artworks, lighthouse, harbour, and skyline. Continue along the waterfront toward bridge and harbour perspectives associated with Prospect Point. Follow the current signed route toward Siwash Rock and, if time and conditions permit, finish at Third Beach or another western shoreline point.
The endpoint should depend on your pace, weather, crowding, mobility, and transportation. A route that looks manageable on a map becomes much longer when you stop repeatedly or wait for changing light.
Cycling connects separated waterfront stops efficiently. Walking makes it easier to notice foregrounds, step toward nearby viewpoints, and change direction without managing a bicycle. Neither is always superior.
Third-party guides offer only broad timing context. Another photographer reported a roughly three-hour photographed walk on a route described as approaching 10 kilometres.3 Route boundaries, pace, starting point, congestion, and the number of stops all affect the result.
Full day: water, forest, landmarks, and sunset
Start at Lost Lagoon or the gardens. If seasonal displays are weak, prioritize reflections, shoreline vegetation, or nearby urban context. Continue onto one designated interior route—such as Rawlings, Cathedral, or Ravine Trails—instead of trying to cover the entire network.
After the interior portion, join the principal waterfront sequence. Photograph Brockton Point if it has not already been covered, then continue toward bridge views, Siwash Rock, and an evening beach. Choose English Bay, Second Beach, or Third Beach according to your final route and transportation plan.
This is an editorial full-day itinerary, not an official duration. It can occupy most of a day because it combines several networks and different styles of observation rather than following one uninterrupted loop. Schedule food, rest, and exit time instead of treating sunset as the only deadline.
Useful substitutions include:
- Replace the gardens with Lost Lagoon when blooms are limited.
- Replace an exposed western shore with forest details in poor weather.
- Replace an unsuitable interior trail with a City-mapped accessible destination.
- End at Second Beach instead of Third Beach when distance or transportation makes the longer continuation impractical.
- Skip Prospect Point when the bridge and mountains are obscured and use the time for closer forest or artwork studies.
Estimate effort from the route you actually intend to travel.
Pedestrians and cyclists should remain in their designated areas, avoid stopping in travel lanes, and follow current signs. Secondary sources disagree about directional descriptions, and routing can change for construction or operations. The cited City guide describes the Seawall as counter-clockwise, but on-site signs take precedence.2
For meal stops, pacing, and waterfront logistics beyond photography, see Vancouver Know’s guide to planning a Vancouver Seawall day.
Getting There Without a Car—and Moving Around the Park
Stanley Park can be reached from downtown on foot or by bicycle, by bus 19, or by car. Visitors staying in the West End or Coal Harbour may not need a car, particularly when the plan focuses on one eastern park zone or a point-to-point waterfront shoot.
The City guide identifies bus 19 stops near the Rose Garden and Malkin Bowl. It also describes the Seawall as paved, mainly flat, approximately 9 kilometres long, and separated into pedestrian and cycling areas. Park Drive is one-way, pay parking applies in most areas, and the Seawall, Beaver Lake, Ravine Trails, and many mapped attractions are identified as wheelchair accessible.2
Those details are a starting point, not a guarantee of present-day conditions. Check current transit service, detours, stop locations, parking systems, road restrictions, and return options before departure. “Mainly flat” does not mean every connection, lookout approach, or interior detour has identical terrain.
Walkers carrying a camera, water, and weather layers may prefer a shorter point-to-point route or one compact zone. Completing the full loop is not necessary to produce a coherent set of photographs. A focused Brockton Point or Lost Lagoon session may be more productive than carrying equipment around the perimeter.
As editorial risk-reduction advice, cyclists should secure equipment, keep straps and bags away from wheels, and stop only where they can fully clear the travel lane. Do not photograph while moving. Follow posted cycling rules rather than treating these suggestions as a complete statement of park regulations.
An accessibility label does not establish current surface quality, every grade or curb transition, washroom status, construction effects, or suitability for a particular mobility device. An accessibility-conscious plan should prioritize a manageable Seawall section and one City-mapped accessible destination, with distance, surfaces, transportation, parking, washrooms, and closures confirmed for the individual traveller.
Readers planning the broader trip around transit and short walking clusters can also use Vancouver Know’s car-free Vancouver guide.
Photograph Responsibly: Trails, Wildlife, and Cultural Works
Photography does not override park operations. Remain on designated forest trails, cycle only on designated paths, use the separated Seawall areas correctly, and comply with temporary or seasonal closures. These measures protect vegetation, soils, wildlife habitat, and other visitors.
Feeding wildlife in Vancouver parks is prohibited and subject to a $500 fine. The City also tells visitors not to chase animals. If you encounter a coyote, stand tall, yell, and do not run; seasonal trail closures may apply while coyotes are denning.2
A known habitat is not a guaranteed sighting location. As ethical photography guidance, do not chase, corner, call, bait, stage, or approach an animal to improve a frame. If your presence changes its behaviour, increase your distance. The animal’s ability to move freely takes priority over image quality.
Apply the same conservative approach along the shoreline. Do not leave designated routes or climb rocks because another photograph appears to have been made from a dramatic position. Tides, waves, slippery surfaces, restrictions, and lawful access can change, and this guide does not verify them for a particular day.
Brockton Point requires cultural attention as well as physical care. Its First Nations works are not a generic decorative backdrop. The City guide identifies works in the area by Susan Point, Robert Yelton, and Luke Marston, including carved cedar portals, a memorial pole, and a bronze sculpture.2
When captioning an image:
- Identify the specific work and artist when that information has been verified.
- Avoid calling every carved work a generic “totem.”
- Do not imply that all works have the same origin, purpose, or status.
- Avoid poses or framing that reduce a culturally significant work to a decorative prop.
- Record enough information during the visit to research the caption accurately later.
This article does not provide a legal conclusion about those activities or about rights associated with recognizable artworks. Check current requirements for the intended use before arranging a commercial or commissioned shoot.
Courtesy matters in ordinary travel photography too. Do not hold a narrow viewpoint indefinitely, block accessible movement, place bags across paths, or direct strangers as though a public area were a closed set. A responsible composition is one made without damaging habitat, increasing risk, or diminishing another visitor’s access.
What to Verify Before You Pack Your Camera
Stanley Park is too dynamic for a route to be treated as permanent. Check the following close to departure:
- Current weather and visibility
- Park, road, beach, and forest-trail closures
- Seasonal wildlife or habitat closures
- Posted Seawall direction and separation signs
- Transit service and return options
- Parking availability and payment rules
- Seasonal washrooms, concessions, and facilities
- Current garden and bloom conditions
- Sunset time for the specific date
- Accessibility details relevant to your route
- Events that may affect roads, paths, or viewpoints
The supplied official park guide does not establish current requirements for commercial photography, commissioned portraits, large crews, tripods, light stands, reflectors, or professional lighting. This article therefore cannot answer those permit questions conclusively. Do not interpret the absence of a rule in a general visitor guide as permission for every setup, crew, or commercial use.
The evidence supplied for this guide also does not establish whether or where drone launches, landings, or flights are permitted. Anyone considering a drone must consult current City of Vancouver requirements and the applicable federal aviation authority. Do not infer that a scenic public park is an authorized operating area.
A search result mentioning a $75 photography permit concerns Stanley Park in Westfield, Massachusetts, not Vancouver.10 It is not evidence of a Vancouver fee or requirement.
A third-party marketplace advertises a two-hour small-group Stanley Park photography walk with smartphone and DSLR instruction.11 Its current price, itinerary, availability, accessibility, participant requirements, pickup arrangements, equipment, and cancellation terms must be reconfirmed directly before booking.
A self-guided visit provides flexible timing and easy route substitutions. An organized walk may add instruction and reduce some logistical work. Neither is automatically better, and this guide does not endorse the listed operator or treat selected customer reviews as representative of every experience.
Packing can remain simple:
- Weather protection appropriate to the forecast
- Comfortable footwear suited to the intended route
- A charged phone or camera and essential batteries
- A downloaded park map for interior travel
- Water and personal essentials for the planned duration
- A carrying system that will not obstruct walking or cycling routes
If route, access, or facility information has changed, Vancouver Know welcomes tips and corrections through its contact channel.
Frequently Asked Questions
What are the best Stanley Park photography spots for a first visit?
For a compact first visit, choose Brockton Point. It combines First Nations artworks, the 1914 lighthouse, harbour, skyline, mountains, and shoreline within one relatively concentrated area.4
For a longer route, add Prospect Point for Lions Gate Bridge and harbour views, Siwash Rock for a coastal landmark, and a western beach for an evening finish. Choose Lost Lagoon instead when reflections, vegetation, and possible birds matter more than recognizable landmarks.
There is no objectively best viewpoint. The right choice depends on whether you want art, architecture, city, bridge, forest, wildlife habitat, or sunset.
How long should I allow for a Stanley Park photography route?
Use about one hour as a suggested planning window for a focused Brockton Point or Lost Lagoon shoot. A half day is more realistic for a waterfront sequence from Brockton Point toward bridge views, Siwash Rock, or a western beach.
A mixed visit combining Lost Lagoon or gardens, an interior trail, major Seawall landmarks, and sunset can occupy most of a day. Published loop estimates vary because pace, route boundaries, transportation, crowds, and photography stops differ.9
Where can I photograph sunset in Stanley Park?
The City identifies English Bay, Second Beach, and Third Beach as sunset-viewing locations.2 Third Beach fits naturally at the end of a western Seawall route, while Second Beach can pair with Lost Lagoon or nearby interior areas. English Bay may provide a more convenient finish toward the West End.
Arrive early enough to assess crowding, shoreline conditions, and cloud cover. Keep an inland fallback because an identified sunset location does not guarantee visible sun or colourful clouds.
Which Stanley Park photography locations are identified as wheelchair accessible?
The City guide identifies the Seawall, Beaver Lake, Ravine Trails, and many mapped attractions as wheelchair accessible.2 That designation is a useful starting point, not a complete assessment of every grade, surface, curb transition, washroom, or temporary closure.
Select a manageable Seawall segment and one mapped destination, then confirm current distance, transportation, parking, surface conditions, facilities, and closures for the individual traveller before departure.
Do I need a permit for portraits, commercial photography, a tripod, or a drone in Stanley Park?
The evidence available for this article does not settle current requirements for commissioned portraits, commercial shoots, large crews, tripods, light stands, professional lighting, or drones. The article therefore cannot give a definitive yes-or-no answer.
Check current City of Vancouver requirements for the proposed activity. Drone users must also consult the applicable federal aviation authority. The $75 permit claim found in some search results concerns Stanley Park in Westfield, Massachusetts, and establishes no fee or rule for Vancouver.10
Before trying to photograph everything, choose one priority: Brockton Point for recognizable Vancouver subjects, Lost Lagoon and the interior for slower natural scenes, or the western beaches for sunset. The strongest route is not the longest one. It is the route that fits your time and mobility, survives a weather change, follows current signs, protects wildlife and habitat, and treats Brockton Point’s cultural works with care.
-
The approximate park area and route lengths are supported by the Stanley Park guide from Vancity Tours, whose measurements broadly align with the City guide. Conditions and route descriptions should still be checked against current official information. ↩
-
City of Vancouver, Stanley Park Map and Guide 2026. ↩↩↩↩↩↩↩↩↩↩↩
-
Yake and Marie, Stanley Park photography stop and route guide. ↩↩
-
Michael Russell Photography’s Stanley Park archive documents the 1914 Brockton Point Lighthouse and other park subjects. ↩↩
-
The Vancity Tours guide discusses Prospect Point’s lookout perspectives and lower platform. ↩
-
Michael Russell Photography documented shoreline trees and a great blue heron at Lost Lagoon. ↩
-
Early-morning crowd advice appears in the Stanley Park photography itinerary from Yake and Marie. ↩
-
JenniMarie Photography describes the variety encountered during a January Stanley Park engagement session. ↩
-
Vancity Tours provides broad walking and cycling loop estimates; photography stops can add substantial time. ↩
-
The quoted fee appears on a photographer’s page about Stanley Park in Westfield, Massachusetts, not Stanley Park in Vancouver. ↩↩
-
Tripadvisor’s Stanley Park photography-walk listing contains operator-supplied details that may change. ↩