
Choose Your Outdoor Photo Time by Light, Subject, and Location
Golden and blue hour may each last roughly 20 to 50 minutes, but local conditions alter the timing. Choose the window that creates the look you want.
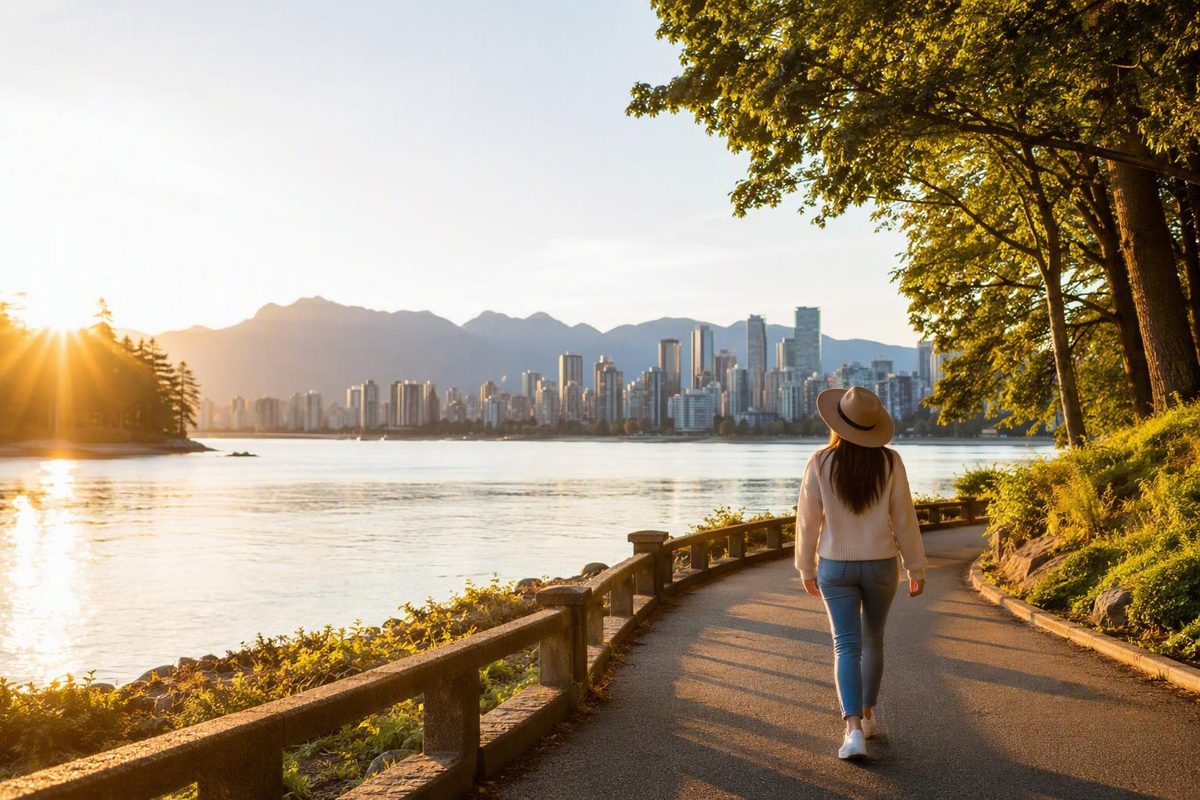
The short answer: start near sunrise or sunset
For most outdoor portraits and naturally lit travel photographs, begin within the first one to two hours after sunrise or the final one to two hours before sunset. The sun is relatively low during these periods, giving you more control over front, side, and backlighting than you usually have under a high sun. Treat this as a practical starting range, not a guarantee that every minute will look the same. Outdoor portrait guidance from Allison Zulawski describes these one-to-two-hour windows and the lighting options created by a low sun.
The most recognizable golden-hour light generally appears shortly after sunrise and shortly before sunset. It often looks warmer and creates softer-looking shadows than clear, overhead daylight. That combination makes it a common choice for portraits, family photographs, waterfront scenes, landscapes, and travel images.
Despite the name, golden hour is not guaranteed to last exactly 60 minutes. Its practical duration changes with location, season, weather, terrain, and nearby obstructions. One equipment-company guide estimates that golden and blue hour may each last roughly 20 to 50 minutes while emphasizing that local conditions alter the timing. MIOPS explains why “hour” is figurative and why the duration varies.
There is no universally best clock time to take photographs outside. A useful window in Vancouver will not occur at the same time throughout the year, and a timetable copied from another city may be substantially wrong. The practical choice depends on:
- The date and location
- Local sunrise and sunset
- Cloud cover, fog, haze, and rain
- Mountains, buildings, trees, and the visible horizon
- Available shade
- The direction the subject or facade faces
- The subject’s comfort and schedule
- The visual result you want
The most reliable decision rule is to choose the intended appearance first, then match it to the available light:
- Choose low sunlight for warmth and visible direction.
- Choose blue hour for a cool, atmospheric result.
- Choose cloud-softened daylight for restrained contrast.
- Choose direct midday light for stark shadows and graphic shapes.
- Choose night when artificial illumination or long-exposure effects are part of the image.
If you simply want an easy answer for an outdoor portrait, start near sunrise or sunset. If you want a particular visual style, let that style—not a universal clock time—determine when you go.
What each outdoor-light window gives you
Outdoor light changes continuously. Its color, intensity, contrast, and direction shift as the sun rises, crosses the sky, and falls below the horizon. The following table is a practical comparison rather than a fixed timetable.
| Condition | Approximate timing | Characteristic appearance | Suitable uses | Main difficulty |
|---|---|---|---|---|
| Pre-sunrise blue hour | Before sunrise | Cool, subdued ambient light, often with a blue-toned sky | Atmospheric landscapes, beaches, silhouettes, quiet city scenes | Low light and rapidly changing conditions |
| Post-sunrise golden hour | Shortly after sunrise | Warm, directional light with longer, softer-looking shadows | Portraits, family photographs, travel scenes, landscapes | Brief and variable working window |
| Clear daytime | Between the morning and evening transitions | Bright light with increasing contrast as the sun rises | General travel photography, architecture, graphic compositions | Overhead facial shadows and bright backgrounds near midday |
| Overcast daylight | Potentially much of the day | Diffused, relatively even, low-contrast light | Portraits, details, street scenes, wooded areas | Can look flat without strong composition or color |
| Pre-sunset golden hour | Shortly before sunset | Warm, directional light that becomes lower as sunset approaches | Portraits, waterfronts, landscapes, backlit scenes | Weather or obstructions may remove the anticipated glow |
| Post-sunset blue hour | After sunset | Cool ambient light with a blue-toned sky | City lights, waterfronts, silhouettes, light trails | Falling light levels and a limited window |
| Night | After twilight | Dark surroundings shaped by artificial lights | Illuminated buildings, traffic trails, reflections, creative low-light images | More preparation, stabilization, or artificial light may be needed |
The daily sequence is:
- Pre-sunrise blue hour
- Post-sunrise golden hour
- Daytime
- Pre-sunset golden hour
- Post-sunset blue hour
- Night
Golden hour
Golden hour is the low-angle-light period near sunrise or sunset. The light often appears warm and directional, while shadows can look less abrupt than those created by a high sun. Because the light comes from closer to the horizon, you can place it behind, beside, or in front of the subject with more control.
For portraits, that direction can reduce the need to make a subject look toward an intensely bright, overhead sun. In landscapes, side light can reveal the shape and texture of terrain or buildings. Backlight can create a bright edge around hair, clothing, leaves, or spray.
Conditions change quickly. The light may begin relatively strong, become warmer as the sun lowers, and then disappear behind a building or mountain before the published sunset. A cloudy sky may also prevent the anticipated color from appearing. Planning helps, but the ability to adapt matters just as much.
Blue hour
Blue hour is the cooler period before sunrise or after sunset, when the sun is below the horizon but some ambient daylight remains. Like golden hour, it is a descriptive term rather than a promise of a 60-minute duration.
Blue hour can suit:
- Atmospheric landscapes
- Waterfront reflections
- Beach silhouettes
- City skylines
- Buildings with illuminated windows
- Streets with vehicle and street lights
- Scenes combining ambient and artificial illumination
The lower light level may require steadier camera handling, a wider aperture, a higher ISO, a slower shutter speed, or support such as a tripod. No single setting works for every scene; the amount of available light and the movement within the frame determine the appropriate approach.
Overcast daylight
Clouds diffuse sunlight, reducing the difference between the brightest and darkest parts of a scene. That can create relatively consistent, low-contrast light through a larger part of the day. For portraits, it can be a useful alternative when a warm sunset appearance is unnecessary.
Overcast light is not automatically better. It may lack the visible direction, color, and depth created by low sunlight. A photograph made under a featureless sky can appear flat unless the composition has strong expression, color, layering, texture, or separation between the subject and background.
Cloud-softened light still has direction. One side of the sky may be brighter, and nearby buildings or trees can block part of that light. Turn a portrait subject gradually and watch how the eyes, cheeks, and nose change.
Midday
Midday is challenging, not forbidden. For people, it can place shadows beneath the eyes and nose while producing intense highlights on the forehead or cheeks.
The same qualities can be effective when used deliberately. Hard shadows can turn walls, stairs, railings, and architectural details into graphic shapes. Strong light may also support bold color, silhouettes, or a high-contrast black-and-white treatment.
The question is not whether midday is inherently bad. It is whether its visual character suits the photograph you want.
Night
Night is a separate creative choice rather than an extension of ordinary daylight photography. Artificially illuminated buildings, vehicle lights, reflections, motion blur, starbursts, and light trails can become the subject. It generally requires more preparation than routine daylight photography, including decisions about stabilization, exposure, and whether movement should appear sharp or blurred. Depositphotos compares night with golden hour, blue hour, and midday as distinct outdoor-photography options.
Sunrise or sunset: choose by logistics as well as appearance
Sunrise and sunset can both provide low-angle light. Neither is inherently superior in every location, so choose between them by considering temperature, crowds, access, the subject’s routine, and the direction the scene faces.
The practical case for sunrise
A sunrise session may offer:
- Cooler conditions during hot weather
- Fewer people at some locations
- A schedule better suited to children who wake early
- Low-angle light before the day becomes busy
- Morning blue hour followed by golden hour
None of these benefits is guaranteed. A popular viewpoint may already be crowded before dawn, and an early start may be impractical if the location has restricted access, limited transport, or a long approach.
Morning can nevertheless be a sensible choice for a family with young children. If a late summer sunset falls after dinner or bedtime, an early session may combine low light with a more cooperative subject. Theoretical light quality has limited value if everyone is tired, hungry, or uncomfortable.
The practical case for sunset
Sunset often provides warm low-angle light followed by cooler blue-hour conditions. That sequence can produce two different looks during one visit: warmer portraits or landscapes before sunset, followed by moodier images after the sun drops below the horizon.
Sunset also fits naturally into many adult schedules. However, it may conflict with dinner, evening plans, or children’s bedtime. Public places may be busy, and dramatic color is never guaranteed. Clouds can block the sun, while an otherwise clear horizon may remain relatively pale.
For family photographs, meals, naps, temperature, bedtime, and mood can matter more than nominally ideal light. A family photographer’s scheduling preference is not a universal law, but the practical principle is useful: choose the period when children are most likely to remain happy and engaged. Allison Macy discusses placing children’s routines ahead of a rigid golden-hour schedule.
Let the location break the tie
Ask where the light will come from, not merely when the sun rises or sets.
An open waterfront with an unobstructed western horizon may retain direct evening light until close to sunset. A mountain, tower, or tree line could remove it much sooner. A street canyon may be bright for a short interval and shaded for the rest of the day. An east-facing viewpoint may align better with morning color, while a west-facing scene may make more sense in the evening.
Crowds and sky color remain dependent on the place and weather. Do not choose sunrise solely because you expect solitude, and do not choose sunset solely because you expect a vivid sky.
The best choice is usually the window in which the subject can be comfortable, alert, and cooperative. Good light supports a photograph; it cannot replace expression, patience, or a workable schedule.
Match the time to the subject and setting
The best time to take photographs outside changes with the subject and the amount of control the setting gives you. An exposed beach, a wooded park, and a downtown street can look very different under the same sun.
Portraits and family photographs
For conventional natural-light portraits, low sun or cloud-diffused light is the easiest starting point. A clear, high sun can create eye and nose shadows, encourage squinting, and place bright highlights beside much darker facial areas.
Useful options include:
- Morning golden hour for early-rising subjects
- Evening golden hour for warm, directional light
- Overcast daylight for restrained contrast
- Open shade for a flexible daytime session
- Blue hour for a cooler, moodier portrait
Comfort should govern the final choice. Consider heat, cold, wind, meals, naps, walking distance, and how long the subject can remain engaged. This is especially important for children, older adults, and anyone standing outside in formal clothing.
Beaches, waterfronts, and open fields
Exposed locations often offer little dependable shade. There may be no building, covered walkway, or dense tree canopy to block overhead light, so timing near sunrise or sunset becomes more valuable.
Low sunlight can skim across water, reveal surface texture, illuminate spray, or create a path of reflected light. Blue hour gives a different result: cooler color, quieter tonal transitions, and opportunities for silhouettes.
If the session involves people, check the actual temperature and wind rather than assuming that summer evenings will be warm or mornings calm. A visually attractive window may still be uncomfortable for the subject.
Parks, woods, and urban streets
Parks, wooded areas, and streets can make a broader portion of the day usable because trees and buildings create shade. The most useful option is often open shade: the subject is protected from direct sunlight but still receives illumination from the open sky.
Not all shade is equally useful. A narrow alley may leave the subject dim while the background remains extremely bright. Pale walls, pavement, glass, sand, and water can reflect additional light toward the subject.
Urban settings can therefore be flexible. An afternoon portrait may work well on the shaded side of a building even when an exposed waterfront would be difficult at the same time. Examine both the face and the background before deciding that the shade is suitable.
Landscapes
For landscapes, decide whether you want warmth, cool atmosphere, or pronounced contrast.
Choose golden hour when you want:
- Warm color
- Long shadows
- Side lighting across terrain
- Visible texture
- Depth created by directional light
Choose blue hour when you want:
- Cooler color
- Subtle tonal transitions
- Silhouettes
- Reflections
- A calm or atmospheric result
If the schedule permits, photograph through the transition. Begin before sunset, continue as the sun approaches the horizon, and remain for the cooler post-sunset light. You may produce several interpretations of the same composition rather than betting the trip on one brief moment.
City scenes with artificial lights
Blue hour is particularly useful when buildings, streets, signs, or vehicles are illuminated. Artificial lights remain visible while the sky still carries color, preventing the background from becoming a completely black field.
This balance is temporary. Watch both elements and adjust as their relative brightness changes.
Night may be preferable when artificial illumination is the dominant subject. Blue hour is more useful when you want the lights to remain visibly connected to the surrounding sky and architecture.
Building facades
Orientation provides a limited but useful planning principle:
- An east-facing facade may receive direct morning light.
- A west-facing facade may receive direct light later in the day.
This is only a starting point. Adjacent buildings, trees, hills, deep overhangs, and seasonal changes in the sun’s path may prevent direct light from reaching the facade. Direct illumination may not even be desirable if you want a soft, cool, or evenly shaded building portrait.
Scout the site or use a sun-direction planning tool, then decide whether the building should be front-lit, side-lit, backlit, or photographed in shade. Seasonal sun angle and surrounding terrain can determine whether light reaches a particular scene at all. Digital Photography School outlines how direction, season, weather, and location affect outdoor timing.
These recommendations should not be extended into definitive rules for wildlife, sports, macro, products, or real-estate photography. Those subjects introduce other constraints, including behavior, event schedules, movement, access, and specialized lighting needs.
Why direct midday sun is difficult for people
Around noon on a clear day, the sun behaves more like an overhead light than a front, side, or backlight. Instead of crossing the face horizontally, it falls downward and creates shadows beneath the brow, eyes, nose, and chin.
Common visible problems include:
- Squinting or closed eyes
- Dark eye sockets
- A prominent shadow beneath the nose
- Bright highlights on the forehead, cheeks, or scalp
- Large differences between lit and shaded facial areas
- Lost detail in bright areas
- A background much brighter than the subject
- Difficulty retaining detail in both highlights and shadows
When a face is in shade against a sunlit background, an exposure that preserves the bright background may leave the face too dark. Brightening the face through exposure alone may then remove detail from the background.
Direct sunlight can also affect the subject’s expression. Glare and heat may make it difficult to keep the eyes open or hold a relaxed pose. Practitioner demonstrations consistently identify squinting, deep eye shadows, and strong highlights as common effects of a high sun. L. David Likes illustrates these overhead-light problems in an outdoor portrait example.
What backlighting changes
Placing the sun behind or slightly to the side of the subject can reduce direct glare and squinting. It may also create a bright edge around hair or clothing. The face will then be darker than the sunlit background and may need:
- Light reflected from a bright wall or pavement
- A handheld reflector
- Fill flash
- A deliberate exposure adjustment
Backlighting is a tool, not an automatic fix. It can introduce flare, reduce contrast, or make the background much brighter than the face. Check the result rather than assuming that turning the subject away from the sun solves every problem.
An outdoor-lighting demonstration by Wolf Amri shows how facial shadows and comfort change as the sun rises, then uses reflected light and flash to brighten a shaded face. Watch the direct portrait-lighting tutorial on YouTube.
A quick midday portrait diagnosis
Before taking a full series, inspect five things:
- Eyes: Are they open naturally, or is the subject squinting?
- Nose shadow: Is it controlled, or does it cut prominently across the face?
- Forehead and cheeks: Are important highlights retaining detail?
- Background: Is it so bright that it competes with the subject?
- Comfort: Can the subject hold a relaxed expression without struggling against glare or heat?
Midday light is harder to manage for a conventional soft portrait. It is not objectively wrong. If hard shadows and intense contrast fit the concept, those qualities can become strengths.
A midday rescue plan when you cannot change the schedule
If noon is your only option, use this fallback sequence:
- Find open shade.
- Reposition the subject.
- Diffuse the direct light.
- Add reflected light.
- Use fill flash if necessary.
- If soft light remains impossible, use the hard light deliberately.
1. Find open shade
Look for the shaded side of a building, the edge of a tree canopy, a covered structure, or another place where direct sun does not strike the subject. The subject should still receive light from the open sky rather than being placed deep in darkness.
Position the person near the edge of the shade and turn them toward the brighter open area. This generally gives the face more shape than placing the subject deep beneath a roof or dense foliage.
Then check the background. If the subject is shaded but the background is in direct sun, the brightness difference may be distracting. Improve it by changing the camera angle, selecting a shaded background, moving closer, or simplifying the composition.
2. Reposition the subject
If shade is unavailable, place the sun behind or slightly to one side of the subject. This reduces the need to look directly into bright light and may produce a rim of illumination.
Watch for patchy light crossing the face. A small change in position can move a bright patch away from the forehead, eyes, or nose—or remove it completely.
3. Diffuse direct sunlight
A scrim or translucent white material can spread direct sunlight before it reaches the subject, creating softer shadow edges. Practitioner guidance recommends using assistants to hold a scrim when creating this kind of temporary diffusion. Lola Marie Photography describes using scrims, reflectors, shade, and flash in strong daylight.
Keep the arrangement simple and controlled. If the material cannot be positioned reliably, use shade or reposition the subject instead.
4. Add reflected light
A reflector returns some of the available sunlight to a shaded face. It is especially useful with a backlit subject. Move it closer or farther away and change its angle until the fill looks natural.
A pale wall, bright pavement, sand, or another reflective surface may provide fill without extra equipment. Be alert to unwanted color casts from painted walls, grass, or strongly colored surroundings.
5. Use fill flash if needed
Fill flash can brighten a face without requiring the ambient background to be overexposed. There is no universal flash-power or exposure setting: distance, ambient brightness, modifier size, camera limits, and the desired balance all matter.
Start with a restrained effect and review the result. For a natural-looking portrait, the aim is often to reduce the difference between light and shadow rather than eliminate every shadow.
Additional checks
A lens hood may reduce unwanted flare when photographing toward the sun, although flare can also be used deliberately. Review the frame whenever you change direction or move the subject.
Protect important highlights and recheck exposure when a cloud passes or the subject moves between direct light and shade. Even within one small area, brightness can change quickly.
If none of these methods produces the soft result you wanted, stop trying to imitate golden hour. Use the actual conditions: photograph hard-edged shadows, silhouettes, bold shapes, saturated colors, or high-contrast scenes.
How clouds, fog, and changing weather alter the answer
Clouds and fog can diffuse direct sunlight, reducing harsh shadows and contrast. That may make midday more practical, particularly for portraits. A clear noon and an overcast noon are meaningfully different lighting conditions even though the clock shows the same time.
An overcast noon may be easier for people than a clear noon because the face is less likely to contain extreme bright and dark areas. Conversely, a cloudy golden hour may fail to produce the warm directional glow you expected. The nominal time does not guarantee the visual effect.
Diffused light still has direction. One side of the sky may be brighter, and buildings or trees can block portions of that light. Turn the subject slowly and inspect how the eyes, cheeks, and nose change. “Overcast” does not mean that all shadows have disappeared.
Working with a flatter result
Even light can be gentle and consistent while cloud cover persists, but it may provide less obvious depth than low sunlight. Strengthen the image through:
- Clear separation between subject and background
- Layering of foreground, subject, and distance
- Strong color relationships
- Texture
- Expression or gesture
- Leading lines
- A darker or simpler background
- Subtle orientation toward the brightest part of the sky
Broken cloud cover may produce alternating periods of soft and direct light. Dramatic clouds can also become part of a landscape composition rather than serving only as a source of diffusion.
Check the forecast near the session, then reassess after arrival. A forecast cannot show exactly how a particular cloud bank will interact with a mountain, skyline, or open horizon at the moment you plan to photograph.
Changing weather can create mood, reflections, and richer surface color, but it also requires practical preparation. Rain can affect photographic equipment, so use appropriate protection or move the session if the equipment cannot be kept dry. Outdoor weather guidance from Lola Marie Photography discusses rain protection and changing exposure conditions.
Plan the exact window for your date and location
A repeatable planning process is more reliable than memorizing a seasonal clock-time table.
1. Define the subject and intended appearance
Begin with two questions:
- What am I photographing?
- What should the photograph feel like?
A family portrait may call for low sun or open shade. A skyline with illuminated buildings may suit blue hour. A graphic street photograph may benefit from hard midday shadows. A landscape session may cover both golden and blue hour.
This decision prevents you from chasing sunset merely because it is conventionally popular.
2. Look up local sunrise and sunset
Use the exact location and date. Do not copy a timetable from another city or from the same city in another season.
For Vancouver or any other destination, date-specific local information is more useful than a generic instruction such as “shoot at 7 p.m.” The same clock time can represent strong daylight in one season and darkness in another.
3. Check the sun’s direction
Determine where the sun will rise, travel, and set relative to your intended background. Decide whether you want front light, side light, or backlight.
For a portrait, confirm where the subject can stand without looking into intense light. For a facade, determine whether direct illumination will reach the visible side. For a waterfront, check whether the composition faces toward or away from the low sun.
4. Inspect terrain and obstructions
A mountain may delay direct morning light. A building or tree line may block evening sun before the published sunset. In a street canyon, the direct-light interval may be brief. At an open waterfront, low sunlight may remain visible longer.
Scout in person if possible. Otherwise, inspect maps, satellite imagery, street-level views, existing photographs, and sun-direction tools. Treat them as planning aids rather than guarantees.
5. Review the weather
Check cloud cover, visibility, temperature, wind, and precipitation close to the shoot. If people are involved, consider how the conditions will feel rather than focusing only on whether the sun will be visible.
Prepare at least one alternative:
- Open shade if direct sunlight is too harsh
- A sheltered composition if the intended viewpoint is unsuitable
- An overcast portrait plan if warm light does not appear
- A blue-hour or night composition if sunset color is absent
- A different date or location if conditions prevent the planned session
6. Select an arrival time
Arriving approximately 20 to 30 minutes before the expected shooting period is a reasonable buffer for walking, scouting, setup, and test photographs, although it is not a universal requirement. MIOPS recommends this advance-arrival range for brief, location-dependent golden- and blue-hour conditions.
Allow more time when the location requires a long walk, unfamiliar access, parking, group coordination, or equipment setup. A casual phone photograph beside a hotel may require almost no buffer; a landscape reached by trail may require substantially more.
7. Scout the background, not only the light
Before placing the subject, confirm:
- Which way the subject will face
- Where direct sun and shade will move
- Whether the background will become brighter or darker
- Whether bright objects will distract from the subject
- Whether people or vehicles are likely to cross the frame
- Whether the composition will still work if the expected sun disappears
- Whether the location remains accessible through the planned finish time
Light that looks good on a face may still produce an excessively bright background. A beautiful sky may require an awkward foreground. Evaluate the complete frame rather than the light in isolation.
Three practical scenarios
A family at an exposed waterfront: The parents want low, soft-looking light, but the summer sunset conflicts with the children’s bedtime. They choose sunrise, arrive early enough to find a clean background, and finish before the location becomes hot or busy. Sunrise is chosen because it combines usable light with a workable family schedule—not because it is universally better.
A city portrait in the afternoon: Waiting for golden hour is impossible. The photographer finds open shade beside a building, turns the subject toward the open sky, and selects a shaded background. The result has controlled facial contrast without requiring the day to be reorganized.
A landscape through sunset: The photographer arrives before the sun becomes low, tests several compositions, and works through the warm pre-sunset period. After sunset, the session continues as the scene becomes cooler and city or shoreline lights appear. One visit produces warm and cool interpretations.
Field checklist
Before leaving, confirm:
- [ ] Local sunrise or sunset for the exact date
- [ ] Direction of the sun relative to the subject and background
- [ ] Current weather, temperature, wind, and visibility
- [ ] Terrain, buildings, trees, and horizon obstructions
- [ ] Location access and closing or transport constraints
- [ ] Subject comfort, meals, naps, and bedtime
- [ ] Enough setup and scouting time
- [ ] A usable shade option
- [ ] A reflector, diffuser, flash, or other fallback if appropriate
- [ ] An alternative composition if the expected light does not appear
Frequently asked questions
How long before sunset should I start taking outdoor photographs?
For most outdoor portraits, a practical starting point is within the final one to two hours before sunset. Work closer to sunset if you specifically want the lowest, warmest light; begin earlier if you need time for several groupings, backgrounds, or compositions. Bella Wang’s outdoor portrait guide recommends working within one to two hours of sunrise or sunset while adjusting for weather and location.
Add an arrival buffer for walking, setup, and test photographs. Account for obstructions as well: a mountain, building, or tree line may remove direct sunlight before the published sunset.
Is an overcast midday better than a sunny golden hour?
Neither is universally better. An overcast midday may be easier for portraits because diffused light can reduce harsh facial shadows and allow more scheduling flexibility.
A sunny golden hour provides more visible direction, warmth, and depth, but it may also create stronger brightness differences and a shorter working window. Choose overcast midday for relatively even light while cloud cover persists; choose golden hour for warm, directional character.
What is the difference between golden hour and blue hour?
Golden hour occurs shortly after sunrise and shortly before sunset, when low sunlight often creates warm, directional illumination. Blue hour occurs before sunrise and after sunset, when the sun is below the horizon and the remaining ambient light looks cooler.
Golden hour commonly suits warm portraits, landscapes, and backlit scenes. Blue hour suits atmospheric landscapes, silhouettes, waterfronts, city lights, and scenes combining ambient and artificial illumination. Neither period is guaranteed to last exactly an hour.
Where should the sun be when taking an outdoor portrait?
There is no single correct position. In strong direct light, placing the sun behind or slightly to the side of the subject can reduce glare and squinting, although the face may then need reflected light, fill flash, or an exposure adjustment.
In open shade or under cloud-diffused light, turn the subject toward the brighter part of the sky and inspect the resulting facial shadows. Low front or side light can also work when it is comfortable and does not create distracting highlights.
Avoid making someone stare into intense direct sunlight merely to brighten the face. Check the eyes, nose shadow, forehead highlights, and background after every significant change in position.
Can I still take good outdoor photographs at noon?
Yes. Find open shade first, then choose a background with manageable brightness. If shade is unavailable, place the sun behind or to the side of the subject, diffuse the direct light, add a reflector, or use fill flash.
You can also work with noon creatively. Hard shadows, silhouettes, strong geometry, bright color, and high-contrast compositions can all benefit from direct midday light. Noon is difficult for soft conventional portraits, not prohibited for outdoor photography.
A simple final decision
Use sunrise or sunset as the default for easier natural-light portraits. Choose blue hour for cooler atmosphere and visible city lights. Use cloud-softened daylight when it is available. If midday cannot be avoided, begin with open shade and repositioning, then add diffusion, reflected light, or fill flash as needed.
Finally, check the local date, sun direction, weather, obstructions, access, and the subject’s comfort. Arrive early enough to adapt: the most useful outdoor light can change within minutes.