
How to Tell What a Damaged Seawall Cap Actually Needs
A wider seawall rebuild may be avoidable when the defect is local, panels remain aligned, and anchorage, drainage, backfill and toe support are serviceable.
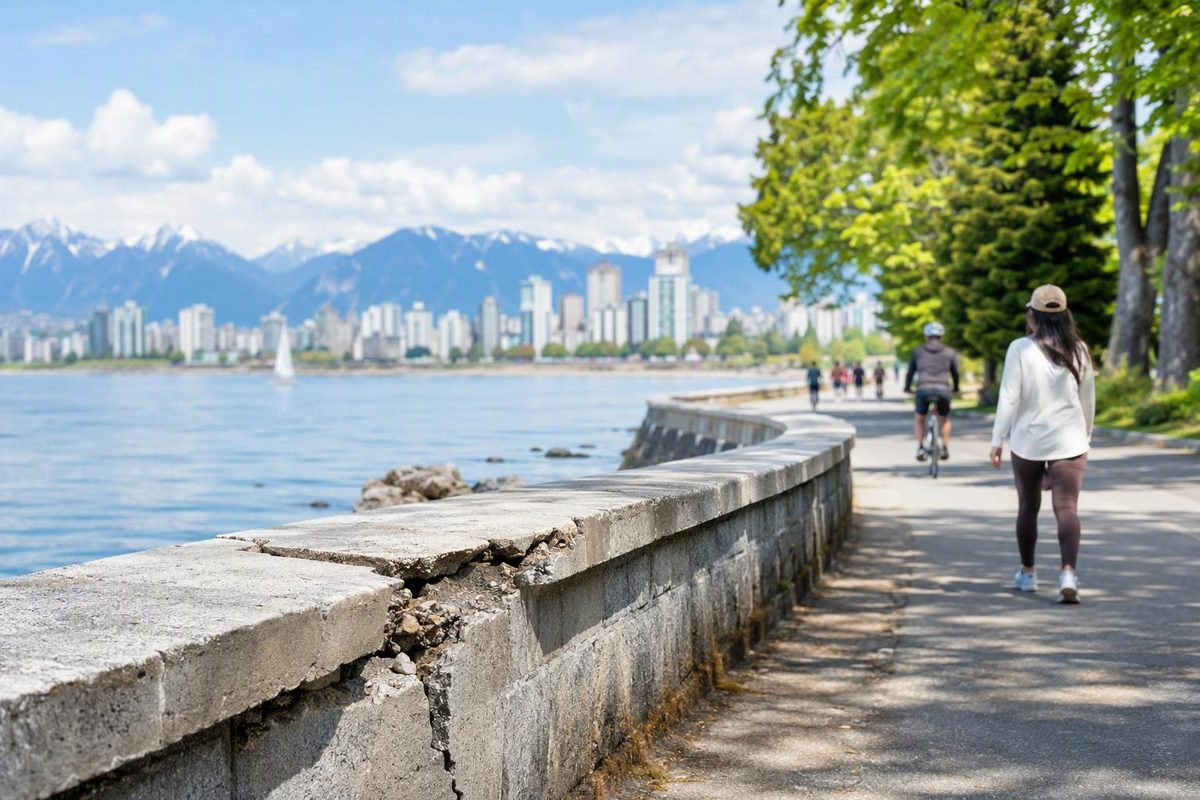
A cracked or spalled seawall cap does not automatically need replacement—but it should not automatically be patched, either. The right response depends on whether the wall is stable, what caused the deterioration, and how much sound concrete, reinforcement, anchorage, and support remain.
Treatments commonly described as “seawall cap repair” perform different jobs:
- Sealant limits water entry and may accommodate movement in a suitable joint.
- Epoxy may bond the faces of a stable crack in sound concrete.
- Polyurethane grout may stop wet leakage or fill certain hidden voids.
- Repair mortar replaces deteriorated concrete.
- Recasting replaces a failed cap section.
- Structural reconstruction addresses failed reinforcement, anchorage, movement, or support.
Selecting among them requires an assessment of the complete seawall—not merely a measurement of the most visible crack.
This is a jurisdiction-neutral overview based largely on commercial contractor and trade guidance. It does not provide Vancouver, British Columbia, Canadian, or national engineering criteria, pricing, licensing rules, or permit requirements. Those details must be confirmed for the property and proposed work with qualified local professionals and the authorities governing the site.
What the cap does—and why it cannot be assessed alone
On many concrete seawalls, the cap is a reinforced horizontal member running along the top of the wall. It connects or encapsulates the tops of vertical panels, helps maintain their alignment, and may interface with tie rods, tie-backs, anchors, or buried concrete deadmen. Contractor guidance describes the panels, cap, and anchoring system as interconnected components rather than independent pieces of concrete (overview of common seawall components).
A simplified system may look like this:
                         LAND / PROPERTY SIDE
        Walkway, yard, building, dock, or other surcharge loads
   ──────────────────────────────────────────────────────────────
                         Surface drainage →

                   BACKFILL / RETAINED SOIL
             Designed drainage or pressure-relief path
                              │
                              ▼
                    buried anchor / deadman
                       ███████████
                            ╲
                             ╲  tie rod / tie-back
                              ╲
   ╔════════════════════════════════════════════╗
   ║ REINFORCED CONCRETE CAP                   ║
   ║ longitudinal and transverse reinforcement ║
   ╚════════════════════════════════════════════╝
        │ panel │ joint │ panel │ joint │ panel │
        │       │       │       │       │       │
~~~~~~~~│~~~~~~~│~~~~~~~│~~~~~~~│~~~~~~~│~~~~~~~│~~~~ WATERLINE
        │       │       │       │       │       │
        │       │       │       │       │       │
        └───────┴───────┴───────┴───────┴───────┘
             toe / berm / embedded support at wall base
                  scour or support loss may occur
Conceptual diagram: the cap, panels, joints, reinforcement, anchorage, backfill, drainage, waterline, and toe support form a connected system. Actual materials, geometry, foundations, loading, and drainage arrangements vary.
That system relationship explains why cap damage may be a symptom rather than the complete problem. Cracking, rotation, or separation can be associated with:
- Panel movement transferring stress into the cap.
- Corrosion of cap reinforcement or tie-back components.
- Hydrostatic pressure behind the wall.
- Leakage through separated panel joints.
- Loss of retained soil through cracks or joints.
- Voids behind or below the wall.
- Deterioration at an anchor or deadman connection.
- Scour or loss of toe and berm support.
For example, loss of toe support may appear alongside tilted panels, gaps near pilings, and rotated or broken cap sections. Separated joints may allow retained soil to escape and progressively reduce support behind the wall (discussion of seawall failure mechanisms).
Cap-only repair can still be reasonable. A localized concrete defect may be repairable without rebuilding the wider seawall if the panels remain aligned and the anchorage, drainage, backfill, and toe support are serviceable. That conclusion, however, should follow inspection rather than assumption.
Warning signs: from minor surface damage to possible instability
Visible defects do not all have the same significance. Fine cracks can result from concrete shrinkage, while recurring cracks, rust, displacement, leakage, or nearby soil loss may point to an active deterioration mechanism. Crack pattern and width are useful observations, but neither establishes by itself whether a defect is harmless or structural.
Document conditions before cleaning, sealing, grinding, or removing material. Take dated photographs from repeatable locations, mark defects on a sketch, and include a ruler or another scale reference when this can be done safely. Note whether each defect is dry, damp, leaking, stable, or apparently changing after storms or unusual water levels.
| Symptom | Possible concern | Sensible next step |
|---|---|---|
| Fine or hairline cracking | Shrinkage, minor surface movement, or an early sign of another process | Photograph, map, and monitor; look for rust, leakage, recurrence, and nearby movement |
| Recurring or widening crack | Continuing movement, pressure, corrosion, shrinkage, or an ineffective previous repair | Obtain assessment before resealing it again |
| Horizontal crack | Pressure, reinforcement deterioration, tie-back concerns, or wall movement may be involved | Inspect the cap, wall alignment, anchorage, and drainage together |
| Diagonal crack | Settlement, panel movement, stress concentration, or shrinkage | Compare both sides of the crack and examine adjacent panels and soil |
| Separation between cap and panel | Loss of bond, differential movement, or panel displacement | Check alignment and anchorage rather than treating it automatically as a sealant joint |
| Uneven cap surface | Surface deterioration, settlement, rotation, or differential movement | Compare cap elevations and adjacent panel alignment |
| Spalling or flaking concrete | Corrosion, delamination, impact, exposure, or failure of a previous patch | Assess the retained concrete and reinforcement before defining the repair |
| Exposed reinforcement | Lost concrete cover with possible corrosion or steel section loss | Seek prompt professional evaluation and a repair design |
| Rust staining | Moisture reaching embedded steel or corrosion of nearby metal | Trace the source and check for accompanying cracks or delamination |
| Cap rotation or settlement | Movement involving the cap, panels, anchors, soil, or toe support | Seek prompt structural or marine assessment |
| Broken cap section | Advanced local deterioration, impact, corrosion, or broader movement | Keep people away from the affected edge and investigate before reconstruction |
| Repaired crack reopening | Continuing movement, unsuitable material, poor preparation, or unresolved pressure | Return to diagnosis instead of repeating the same repair |
These associations are possible explanations, not diagnostic rules. Commercial sources provide conflicting crack-width thresholds and interpretations, so no generic dimension should be used as a universal decision point.
Rusting reinforcement deserves particular attention. Corrosion products expand against the surrounding concrete, contributing to cracking and delamination of the cover. Spalling may then expose more steel to moisture and chlorides, allowing deterioration to continue (trade discussion of marine-concrete deterioration).
Look beyond the cap for related warning signs:
- Water actively leaking through cracks or panel joints.
- Panels that lean, bow, or no longer form a straight line.
- Gaps at joints, pilings, or cap interfaces.
- Low spots in a yard, walkway, or paving.
- Sinkholes or depressions behind the wall.
- Soil appearing in the water or disappearing from behind the wall.
- Suspected voids beneath paving or landscaping.
- Dock, boardwalk, or piling connections that have shifted.
- New cracks in adjacent slabs or structures.
When cap displacement appears with leaning panels, a sinkhole, rapid soil loss, or other evidence of movement, use conservative judgment: keep people and loads away from the affected area where practicable and contact qualified local professionals promptly. This is not an emergency classification, and the supplied commercial evidence does not establish authoritative barricading criteria. There is no reliable universal amount of cracking, tilt, or soil loss that defines an emergency for every seawall.
Diagnosis before repair: inspect the whole seawall system
Start with stability and root cause—not crack width.
Visible cap damage
        │
        ▼
Is there displacement, leaning, soil loss, sinkholing,
active leakage, suspected anchor failure, or uncertain stability?
        │
        ├── Yes → Use conservative access precautions and obtain
        │         structural or marine engineering assessment.
        │         Investigate the complete wall system.
        │
        └── No / not observed
                 │
                 ▼
Is the defect recurring, wet, corroded, delaminated,
deep, active, or connected to a joint?
                 │
                 ├── Yes → Diagnose the cause and retained condition
                 │         before selecting a material.
                 │
                 └── Apparently stable and localized
                          │
                          ▼
                 Define the actual objective:
                 monitor, seal, bond, fill a void,
                 restore concrete, or recast.
Assess the cap itself
A cap assessment may consider:
- Overall line, elevation, rotation, and separation.
- Crack locations, patterns, terminations, and evidence of change.
- Previous patch boundaries and recurring cracks.
- Hollow-sounding or visibly delaminated areas.
- Spalling, scaling, crumbling, and impact damage.
- Exposed reinforcement and visible corrosion.
- The amount and condition of concrete likely to remain after unsound material is removed.
- Interfaces with panels, tie rods, dock hardware, pilings, and walkways.
Measurements can establish a baseline for later comparison. They should not be treated as a substitute for structural judgment, and any survey or monitoring method should be selected by the professional responsible for the assessment.
Extend the inspection to the wall and retained soil
The investigation may also need to cover:
- Panel alignment, cracking, bowing, and waterline deterioration.
- Open or displaced panel joints.
- Tie rods, tie-backs, anchors, and deadmen where accessible or reasonably inferable.
- Drainage condition and signs of pressure buildup.
- Backfill settlement and possible hidden voids.
- Active leakage and evidence that water is carrying soil.
- Toe or berm support.
- Scour, undermining, and changing bed conditions.
- Nearby slabs, docks, pilings, buildings, and utilities.
Potential deterioration mechanisms described in the supplied trade and contractor material include chloride exposure, repeated wetting and drying, reinforcement or tie-back corrosion, hydrostatic pressure, saturated or unstable soil, panel movement, joint separation, and erosion. Several mechanisms can occur at the same location.
Separate diagnosis from material selection
Choosing a product is not the same as diagnosing a failure. Before specifying epoxy, polyurethane, sealant, mortar, coating, or an overlay, the designer or contractor should understand:
- Whether the crack is stable or moving.
- Whether it is dry, damp, submerged, or actively leaking.
- Its depth and relationship to reinforcement.
- Whether corrosion has reduced steel area or bond.
- Whether the concrete around it remains sound.
- Whether a void exists behind the cap or wall.
- Whether pressure, anchorage deterioration, or panel movement continues.
- Whether the treatment must transfer load or merely limit water entry.
A qualified structural or marine engineer is especially important when movement, soil loss, widespread deterioration, substantial corrosion, suspected anchorage failure, or uncertainty about remaining capacity is present. Commercial repair guidance generally treats stability as the key distinction between localized repair and broader reconstruction, although it does not establish authoritative engineering criteria (condition-based repair discussion).
Assemble evidence before requesting quotes
Give prospective professionals useful background information:
- Dated overview and close-up photographs.
- A map of visible cracks and spalls.
- Notes about observed changes.
- Dates of storms, high-water events, impacts, or nearby construction.
- Records and photographs of previous repairs.
- Leakage locations and the conditions under which leakage occurs.
- Known low ground, sinkholes, or previously filled depressions.
- Available plans, surveys, permits, and earlier reports.
- Dock, piling, boardwalk, utility, and building conflicts.
- Land-side and water-side access constraints.
This can improve the first conversation but does not replace field investigation. The supplied commercial evidence establishes no authoritative test methods, emergency thresholds, acceptance limits, or universal crack criteria. Those must come from the project engineer, applicable standards, product requirements, and the authorities governing the actual site.
Repair methods compared: what each one does—and does not do
“Repair” is too broad to identify a technical solution. The method must match both the intended function and the diagnosed failure mechanism.
| Method | Primary purpose | Suitable general conditions | Moisture limitations | Structural limitations | Questions to ask |
|---|---|---|---|---|---|
| Joint sealant or surface sealer | Limit water entry and accommodate suitable joint movement | Stable joints or minor surface defects with sound surrounding material | Product-specific preparation and moisture limits apply | Does not replace steel, reconnect anchors, or stop wall movement | Is this a designed joint or a crack? What movement can the material accommodate? |
| Waterproof coating | Reduce surface water penetration | Sound, prepared concrete without unresolved pressure or active deterioration | Installation conditions vary by product | May conceal symptoms and does not stabilize moving concrete | How will cracks, trapped moisture, and future inspection be handled? |
| Low-pressure epoxy injection | Bond the faces of a suitable stable crack | Generally dormant cracks in otherwise sound concrete | Commonly associated with relatively dry conditions; verify the specified system | Does not replace reinforcement lost to corrosion or correct continuing movement | Is the crack dormant? Is the concrete sound? How will the work be verified? |
| Polyurethane grout | Stop wet leakage, fill certain voids, or reduce water and soil-loss pathways | Wet cracks, active leakage, or cavities suited to the grout design | Often selected for wet conditions | Leakage control or void filling does not automatically restore cap capacity | What is the intended grout path, and how will injection effects be monitored? |
| Localized repair mortar | Replace spalled or deteriorated concrete | Bounded damage with adequate retained concrete, reinforcement, and support | Product and substrate requirements vary | Cannot compensate for unresolved corrosion, anchor failure, or movement | What will remain after demolition, and how will steel condition affect the scope? |
| Polymer-modified overlay or overpour | Restore a larger surface or cap profile | Broad but comparatively shallow deterioration where the retained system is adequate | Preparation, weather, and moisture requirements are system-specific | A new surface does not make an unstable cap or wall sound | How were bond, reinforcement condition, and substrate adequacy evaluated? |
| Saw-cut and recast section | Replace an isolated failed cap segment | Bounded failure with serviceable adjacent cap and stable wall components | Placement and curing require suitable protection | Connections, reinforcement continuity, and movement require design | How will the new section connect to retained concrete and steel? |
| Partial or full cap replacement | Reconstruct a severely deteriorated cap | Widespread deterioration or failed sections over a wall capable of supporting a new cap | Construction must account for water and weather exposure | Cap replacement alone cannot correct failed panels, anchors, or soil support | What related wall work is included, and what findings would expand the scope? |
| Anchoring, drainage, soil stabilization, or wall work | Address causes outside the cap | Confirmed anchor, pressure, void, erosion, or panel problems | Method-specific | Must be coordinated with the wider wall system | What evidence connects the proposed work to the diagnosed failure? |
Sealants and coatings
Sealants may maintain a designed joint or reduce water entry through a stable surface opening. Coatings may limit exposure of properly prepared concrete. Neither is automatically a structural repair.
Sealing a visible opening without understanding the wall’s drainage and soil-loss mechanisms can leave the underlying cause unresolved.
Low-pressure epoxy injection
Epoxy injection may rebond a suitable stable crack by filling the internal crack plane and bonding its faces. A typical process can include sealing the exposed surface, installing injection ports, and introducing a low-viscosity resin under controlled pressure.
Suitability depends on moisture, crack activity, contamination, geometry, and concrete condition. Epoxy should not be assumed to replace reinforcement lost to corrosion or correct continuing movement. Trade guidance distinguishes relatively dry epoxy applications from polyurethane products selected for wet leakage (epoxy and polyurethane comparison).
Polyurethane grout
Polyurethane grout is commonly positioned for wet cracks, active leakage, and certain hidden soil cavities.
The result must be described precisely. Stopping a leak is not the same as restoring corroded reinforcing steel. Filling a cavity does not necessarily repair a failed tie-back. Questions about grout travel, injection pressure, displaced water, and effects on nearby soil or structures should be addressed in the project-specific method rather than assumed from generic product descriptions.
Localized spall repair
A general concrete-restoration sequence may include:
- Delineating and removing unsound concrete.
- Exposing enough reinforcement to assess its condition.
- Cleaning, treating, supplementing, or replacing steel as designed.
- Preparing sound concrete edges and the receiving substrate.
- Installing a specified bonding system where required.
- Placing a compatible repair material suited to the exposure.
- Protecting and curing the material according to its specification.
- Inspecting the work and recording concealed conditions.
Commercial trade guidance describes this general progression for spalled marine concrete, but the actual materials and acceptance requirements must be specified for the project.
Overlays, overpours, and recast sections
A polymer-modified overlay or overpour may be considered when deterioration covers a larger area but the retained cap, reinforcement, and support remain adequate.
For an isolated failed section, controlled cutting and recasting may preserve serviceable adjacent concrete.
No universal concrete strength, reinforcement layout, waterproofing schedule, or curing period should be copied from a contractor page. Those details depend on design loads, exposure, substrate condition, applicable standards, available products, and manufacturer requirements.
Patch, rebuild, or replace: a condition-based decision framework
A cap assessment can lead to five broad outcomes:
- Monitor or maintain.
- Seal a stable joint or minor surface defect.
- Patch localized concrete deterioration.
- Recast one or more cap sections.
- Replace the cap and address related structural defects.
1. Monitor or maintain
Monitoring may be reasonable when cracking appears fine and stable, the concrete remains sound, and there is no associated rust, leakage, displacement, soil loss, or wall movement. Dated observations should define what “stable” means for that location.
Maintenance might include replacing failed joint sealant and preserving designed surface drainage. It should not cover or erase evidence needed to evaluate change.
2. Seal a stable defect
A stable joint or nonstructural surface opening may be sealable when the surrounding concrete is sound and the treatment will not interfere with the intended drainage system. Material selection must reflect actual movement, moisture, and exposure conditions.
If the opening returns, shifts, leaks, or develops rust staining, the response should return to diagnosis rather than another cosmetic application.
3. Patch localized deterioration
Localized patching may be appropriate when removal exposes a bounded area of damage and confirms that sufficient concrete, reinforcement, panels, anchorage, drainage, backfill, and toe support remain serviceable.
This is more than spreading mortar over a spall. Unsound concrete must be addressed, the reinforcement evaluated, and the repair integrated with a sound substrate.
4. Recast one or more sections
Partial rebuilding may suit isolated spalling, exposed reinforcement, impact damage, or a failed section where neighboring portions remain serviceable. Section replacement can avoid unnecessary demolition, but only if reliable connections and a sound wider load path can be established.
5. Replace the cap and address related defects
Conditions that may move a project toward full cap replacement or broader stabilization include:
- Extensive reinforcement loss.
- Widespread or recurring spalling.
- Crumbling or deeply deteriorated concrete.
- Cap rotation or marked differential settlement.
- Leaning or bowing panels.
- Failed or severely corroded tie-backs.
- Major backfill washout or voiding.
- Unstable toe support or scour.
- Repeated unsuccessful patches.
- Damage too extensive to create dependable repair boundaries.
Full cap replacement does not necessarily mean replacing the entire seawall. A new cap may be constructed over retained panels and support components if those components are shown to be adequate. Contractor guidance describes cap replacement as potentially separate from tie-back, drainage, and joint work while acknowledging that those systems may also require repair (examples of cap and related seawall work).
Use explicit decision gates:
- Gate 1—Initial inspection: Does the observed condition support a localized scope, or is stability uncertain?
- Gate 2—Removal of unsound concrete: Is the deterioration larger or deeper than it first appeared?
- Gate 3—Reinforcement assessment: Can existing steel be retained, or is supplemental or replacement reinforcement needed?
- Gate 4—Anchorage and movement review: Are stresses reaching the cap from panels, tie-backs, pressure, or support loss?
- Gate 5—Final engineered scope: Should the work remain a patch, expand to section recasting, or become cap replacement with wider stabilization?
A cosmetic patch can conceal corrosion, leakage, drainage pressure, soil loss, or active movement without resolving them. Conversely, replacement is not automatically superior. Cost, disruption, retained-condition risk, failure consequences, and expected performance can be compared meaningfully only after the cause and remaining condition are understood.
What a professional cap-repair or replacement project may involve
Once the objective is defined, the project moves from diagnosis into design, approval checks, access planning, construction, and verification.
Preconstruction
A professional project may begin with:
- Site investigation and condition documentation.
- Engineering analysis or repair design where needed.
- Identification of the authorities and approval processes that may govern the work.
- Development of a contractor scope based on the design and known conditions.
- Land-side and water-side access planning.
- Review of utilities, docks, pilings, boardwalks, walkways, and nearby buildings.
- Planning around tides, weather, and water exposure.
- Debris, wash-water, resin, grout, and spill-containment planning.
- A procedure for unexpected corrosion, voids, or anchor damage.
Approval and professional-authorization requirements are jurisdiction-specific. Owners should ask the relevant local authorities and professional regulators which rules apply; this article does not establish that a particular permit, licence, or approval is required for every project.
Localized patching
Depending on the design, localized construction may involve:
- Marking repair boundaries.
- Controlled removal of unsound concrete.
- Assessment and treatment of reinforcement.
- Substrate cleaning and preparation.
- Forming where edges or the cap profile must be rebuilt.
- Installation of the specified bonding and repair system.
- Protection from water, weather, vibration, and premature loading.
- Product-specific curing.
- Finishing and inspection.
- Photographs of reinforcement and other concealed conditions before covering them.
The written scope should say who evaluates newly exposed reinforcement and how unexpected deterioration changes the work.
Partial or full cap replacement
A broader recasting or replacement project may add:
- Excavation behind the cap where access is necessary.
- Temporary protection or stabilization.
- Controlled demolition around panels and anchorage.
- Retention, removal, or replacement of reinforcement.
- Tie-back or anchor work where the condition or design requires it.
- Installation of forms and reinforcement.
- Concrete placement and curing.
- Form removal and inspection.
- Backfilling under the specified project procedure.
- Grading and drainage restoration.
- Reconstruction of landscaping, paving, fencing, or walkways.
One contractor’s generalized replacement sequence includes excavation, demolition, reinforcement, concrete placement, curing, backfilling, and grading. The same source notes that confined access may require work from a modular barge (commercial description of replacement logistics).
Why access can dominate the project
Constraints can include:
- Docks and boat lifts obstructing the water side.
- Boardwalks or patios covering the cap.
- Pilings passing through or close to the work.
- Buildings or pools near the wall.
- Narrow side yards or no equipment route from land.
- Water too shallow or too deep for preferred equipment.
- Tides that limit working windows.
- Utilities crossing or running beside the cap.
- Restrictions on noise, vibration, parking, or common-property access.
The written scope should define:
- Inspection hold points.
- Who can approve changes.
- How concealed conditions will be documented and priced.
- Required photographs and test records.
- Protection of docks and adjacent structures.
- Debris and wash-water containment.
- Cleanup and disposal.
- Landscape and walkway restoration.
- Any project-specific alignment checks.
- Engineer review or sign-off where required by the design or governing process.
A broad “price per foot” description cannot communicate these obligations adequately.
Cost, schedule, access, and permitting: how to compare quotes
There is no supported national, Canadian, or Vancouver-area seawall cap repair benchmark in the supplied evidence. The available published figures are commercial regional examples from Florida, and their scopes are not standardized.
Principal cost variables include:
- Wall and cap length.
- Depth and extent of deterioration.
- Concrete demolition volume.
- Reinforcement corrosion and section loss.
- Tie-back, anchor, or deadman work.
- Drainage and soil stabilization.
- Engineering and surveys.
- Approval and application costs.
- Formwork and temporary works.
- Repair mortar, grout, resin, reinforcement, or concrete.
- Water depth and tide windows.
- Land access or barge mobilization.
- Dock, piling, boardwalk, and utility conflicts.
- Debris containment and disposal.
- Backfill, grading, paving, and landscaping.
- Testing, inspection, and documentation.
- Allowances for concealed conditions.
Illustrative contractor-supplied Florida figures—not transferable market rates
A Palm Beach and Broward County contractor lists:
- Minor cap crack sealing and waterproof coating: $20–$45 per linear foot
- Partial cap repair or section replacement: $60–$120 per linear foot
- Full cap removal and replacement: $100–$200 per linear foot
The page contains overlapping project and table ranges, so its figures should be treated as commercial estimates rather than a consistent schedule of rates (South Florida contractor pricing page).
A separate Sarasota–Manatee real-estate blog quotes $150–$400 per linear foot for cap-beam repair. Although the page title references 2026, its body characterizes the figures as early-2025 local pricing and does not precisely define what the range includes (Sarasota–Manatee commercial cost discussion).
The difference does not prove a market price or a contradiction. Geography, source date, scope, access, engineering, approvals, demolition, reinforcement, contractor overhead, and restoration may all differ.
Compare quotes line by line:
- Assessment and field investigation.
- Engineering and repair details.
- Surveys or movement measurements, if proposed.
- Approval and application fees.
- Mobilization and barge costs.
- Dock or walkway removal.
- Demolition quantities.
- Reinforcing steel and corrosion treatment.
- Tie-back and anchor allowances.
- Drainage and void work.
- Forming and repair material or concrete.
- Curing protection.
- Testing and inspection.
- Debris control and disposal.
- Backfill and restoration.
- Contingency for hidden deterioration.
Permitting and professional-licensing requirements must be verified for the actual property and work. Ask the relevant authorities and professional regulators rather than inferring local requirements from a Florida contractor’s statements.
Ask each bidder:
- What is explicitly excluded?
- What happens if demolition reveals more corrosion or delamination?
- Who diagnosed the cause and designed the repair?
- Which approval checks, applications, and fees are included?
- Are anchorage, drainage, voids, and panel movement within the scope?
- What access assumptions support the price?
- How will installation be inspected or verified?
- What documentation will the owner receive?
- Who pays for dock, paving, landscaping, or utility restoration?
- What conditions are excluded from the warranty?
- Does the warranty exclude recurrence caused by movement, corrosion, pressure, soil loss, or anchor failure?
- What unit rates or change procedures apply to concealed work?
The lowest per-foot price may represent a narrower scope rather than better value. The highest price does not prove that a proposal is technically complete.
DIY boundaries, post-repair monitoring, and preventive maintenance
The reasonable DIY boundary is narrow. Replacing failed sealant in an otherwise stable and accessible joint may be limited protective maintenance, but it is not structural concrete repair.
DIY sealant work should not be treated as suitable when there are:
- Shifting or uneven cap sections.
- Leaning or bowed panels.
- Soil erosion, low ground, or sinkholes.
- Drainage problems.
- Large, recurring, or changing cracks.
- Exposed or rusting reinforcement.
- Active leakage.
- Spalling or hollow concrete.
- Possible hidden structural deterioration.
Commercial guidance similarly distinguishes replacement of damaged cap sealant from structural cap restoration and warns that sealing without accounting for drainage can leave pressure problems unresolved (DIY and professional repair boundaries).
Structural injection, concrete demolition, reinforcement repair, active-leak work, underwater work, and repair of a moving wall require specialized diagnosis, materials, equipment, containment, and safety planning. They should not be reduced to a generic homeowner procedure.
Establish a post-repair baseline
After the work, retain:
- Dated overview and detail photographs.
- A drawing showing repaired cracks and sections.
- Available cap and panel alignment records.
- Notes on adjacent ground levels or visible settlement.
- Locations of joints, drains, and previous leakage.
- Reinforcement photographs taken before concealment.
- Product information and delivery records where applicable.
- Inspection, testing, and engineer documentation.
- Warranty terms and exclusions.
- Maintenance instructions.
Observe the area periodically and after major storms, unusual water levels, impacts, or nearby construction. No single interval applies to every wall; the repair type, exposure, condition, and project recommendations should determine the schedule.
Watch for:
- Cracks returning at or beside repairs.
- Renewed rust staining.
- Fresh spalling or hollow areas.
- Separation between old and new concrete.
- Leakage through repaired cracks or joints.
- New low ground or sinkholes.
- Changes in cap or panel alignment.
- Dock or piling movement near the repair.
- Blocked or altered drainage.
Questions for the contractor and engineer
- What is the diagnosed cause rather than just the visible symptom?
- Which standards and local requirements apply?
- Is the proposed material intended to seal, bond, fill, restore concrete, or transfer structural load?
- What is known about reinforcement condition and section loss?
- How were tie-backs, anchors, and deadmen evaluated?
- Are the panels, joints, toe support, and backfill stable?
- How will drainage be addressed without worsening erosion?
- Which approval checks are required, and who handles them?
- What moisture, tide, temperature, and curing restrictions apply?
- How will docks, utilities, buildings, and access constraints be managed?
- What inspection hold points occur before work is concealed?
- How will installation be documented or verified?
- What completion records will be delivered?
- What future maintenance is required?
- What is excluded from the warranty?
Maintenance can limit water entry, preserve joints, and make change easier to identify. It cannot compensate for unresolved wall movement, failed anchors, reinforcement corrosion, hydrostatic pressure, or loss of soil and toe support.
Frequently asked questions
Can a seawall cap be repaired without replacing the entire seawall?
Potentially. Stable localized spalls may be patched, and isolated failed sections may be cut out and recast. Even complete cap replacement may leave existing panels in place when the panels, anchorage, drainage, backfill, and toe support remain adequate.
The deciding issue is not simply whether cap-only work is physically possible. It is whether the retained seawall can reliably support and interact with the repaired or replacement cap. Leaning panels, failed anchors, washout, or unstable support require a broader response.
How can I tell whether a cap crack is cosmetic or structural?
Appearance or width alone usually cannot establish that distinction. Fine cracking may result from shrinkage, but concern increases when a crack recurs, changes, leaks, contains rust, crosses a displaced section, or appears with leaning panels, low ground, sinkholes, or soil loss.
Document the defect and examine the wider system. Classification may require assessment of crack activity, delamination, reinforcement, wall alignment, anchorage, drainage, backfill, and toe support.
What is the difference between epoxy injection and polyurethane grout?
Epoxy injection is generally considered for bonding the faces of a suitable stable crack in sound concrete, commonly under relatively dry conditions. It does not automatically replace capacity lost through corroded reinforcement or correct continuing movement.
Polyurethane grout is more commonly associated with wet leakage and certain hidden voids. It may stop water flow or fill space behind a wall, but that does not necessarily restore structural capacity. Separate work may be required for deteriorated concrete, reinforcement, anchorage, drainage, or soil support.
How much does seawall cap repair cost?
There is no reliable universal price per foot. Cost depends on the repair objective, demolition quantity, reinforcement condition, anchorage, drainage, access, water depth, tides, engineering, approvals, containment, disposal, and site restoration.
The Florida figures cited above range from tens to several hundred dollars per linear foot for differently described cap work. They are commercial examples with different locations, dates, and inclusions—not validated Vancouver, Canadian, or national benchmarks. Obtain site-specific scopes and compare their assumptions, exclusions, line items, and concealed-condition procedures.
Can a homeowner repair a seawall cap?
A homeowner may be able to replace failed joint sealant as limited protective maintenance when the wall is stable and there are no signs of leakage, erosion, movement, corrosion, drainage trouble, or hidden deterioration.
Concrete demolition, reinforcement work, structural injection, active-leak repair, underwater work, and repairs to a moving cap or wall fall outside that boundary. When the defect’s significance is uncertain, document it and obtain an assessment before covering it with sealant or patch material.
The practical decision path is straightforward: document the symptoms; check for movement, leakage, and soil loss; assess the complete seawall; identify whether the objective is sealing, bonding, void filling, concrete restoration, or structural reconstruction; and compare detailed written scopes rather than headline prices.
Cap-only repair may be appropriate for stable, localized damage. Movement, anchorage failure, substantial corrosion, or washout requires site-specific evaluation by qualified local professionals. This article provides general information and cannot replace engineering review, local approval checks, or a project-specific repair design.