
A Stress-Less Plan for Better Family Pictures at the Beach
Aim for one or two structured portraits, several interactive frames and a few environmental details to create variety without nonstop posing.
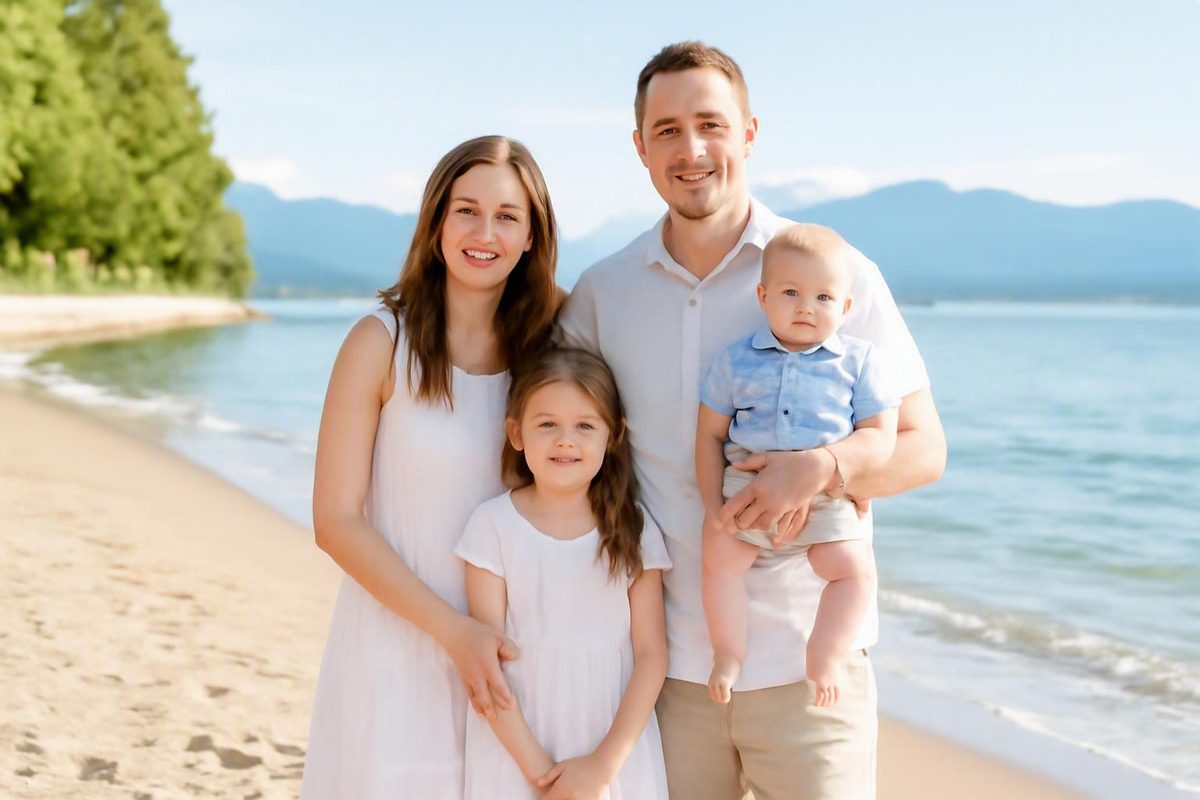
Successful family beach photos rarely depend on one perfect pose, a prescribed outfit, or a flawless sunset. They come from a workable sequence: choose a realistic date and time, understand the location, coordinate comfortable clothing, decide which portraits matter most, and then make room for movement and play.
That plan can support three different goals. You might hire a photographer for a polished gallery, use a phone for a few vacation pictures, or build a complete do-it-yourself setup with a tripod. Each route can work, but the preparation is not interchangeable.
Most outfit, posing, and scheduling suggestions in this guide come from working photographers, commercial photography guides, affiliate-supported tutorials, and families describing their own sessions. Treat them as practical experience rather than comparative research or universal rules. Local access requirements, posted warnings, participant needs, and the conditions on the day should always take priority.
Plan the Session Before Everyone Reaches the Sand
Begin by deciding what you want to produce:
- A professional portrait gallery: Best suited to families seeking consistent editing, numerous group combinations, help arranging a large party, or photographs intended for printing.
- A few informal vacation pictures: A phone, one willing camera operator, and a short list of desired frames may be enough.
- A complete DIY portrait session: This requires a supported phone or camera, a timer or compatible remote, equipment testing, and somebody willing to manage framing and focus.
If you intend to hire a local photographer, begin searching early—particularly if your vacation dates are fixed, your group is large, or you want a popular sunrise or sunset window. This is experience-based advice, not a universal booking deadline. Availability varies by destination, season, weekday, and photographer. In one personal account, a family arranging a session for 19 people booked months ahead and supplied its photographer with a detailed list of households and requested combinations, illustrating why a large group may benefit from advance coordination (read the extended-family session account).
When possible, schedule the session near the beginning of a trip. That preserves another possible day if illness, travel delays, weather, or other conditions interfere with the first plan. The same family account recommends early-trip scheduling partly to reduce the chance that a new sunburn will be visible in the portraits.
Scout at the intended time
Visit the location at approximately the time you expect to take pictures. A beach can look very different in the morning, at midday, and shortly before sunset. Check:
- The direction and intensity of the light
- Whether people will face bright glare and squint
- Where the sun will appear relative to the water
- How chairs, tents, buildings, signs, or beachgoers affect the background
- How exposed the area is to wind
- How far everyone must walk over sand or another surface
- Whether the meeting point is easy to identify
- Realistic parking, drop-off, and travel time
- Whether a simpler backup background is available
A clean composition does not require an empty beach. Look for an angle that places open water, sky, or an uncluttered section of sand behind the family. A lower viewpoint, tighter frame, or slight change of direction may remove distractions even when other people are present.
Scouting is especially useful for a DIY session because the camera operator cannot continually recompose after joining the group. An affiliate-supported DIY tutorial recommends inspecting the location at the planned time, testing equipment before the session, protecting equipment from loose sand, and reviewing the photographs before leaving (see the DIY beach-portrait workflow).
Confirm details instead of assuming
Access conditions and operating rules differ by location and can change. Consult the applicable beach authority, park office, property manager, or photographer, and follow current posted instructions. Do not assume that pets, drones, large props, sparklers, professional photography, or entry into a particular natural area will be permitted. Confirm practical details such as gates, operating hours, parking, restrooms, and available routes rather than relying on advice about another beach.
If you are hiring a photographer, settle these arrangements before the session:
- Exact meeting point
- Day-of contact method
- Weather decision process
- Rescheduling or cancellation terms
- Expected session duration
- Priority family groupings
- Any participant-specific requirements the photographer should know
Prepare one day-of bag
Keep the essentials together rather than distributing them among several vehicles, hotel rooms, or households:
- Complete outfits, including underlayers and accessories
- Water and simple snacks
- Spare clothes for young children
- A layer for anyone likely to get cold
- A towel or coordinating blanket
- Brush, ties, clips, pins, or other hair controls
- A familiar toy or comfort item
- One or two simple family activities
- Phone, camera, charged batteries, remote, and memory card as applicable
- Written shot list
- Exact meeting point and contact information
Build in time for parking, walking, clothing adjustments, and helping children settle. “Arrival time” should mean arrival at the photography spot, not the moment the first vehicle enters the parking area.
Choose a Time That Works for the Light and the Family
Early and late light is commonly recommended for a practical reason: a bright beach can contain a greater brightness range than a camera can usefully record. If the camera preserves detail in the bright sky and water, faces may appear dark. If it exposes for the family, the background may become excessively bright. Lower-contrast light near the beginning or end of the day can make the two easier to balance, although it does not guarantee a perfect exposure (see this explanation of beach dynamic range).
“Golden hour” is a general period near sunrise or sunset, not a fixed appointment of identical length everywhere. Its timing and appearance vary with the date, latitude, cloud cover, terrain, surrounding buildings, and direction the beach faces. Plan with the exact location and date.
Sunrise versus sunset
The following are common practitioner observations, not promises:
| Consideration | Sunrise | Sunset |
|---|---|---|
| Crowds | Often reported to be quieter | May overlap with beachgoers and other photographers |
| Color and mood | May produce cooler or pastel-looking conditions | May produce warmer-looking light |
| Family schedule | Can suit a household already awake early | Avoids a pre-dawn wake-up |
| Young children | May fit an early riser’s routine | May conflict with dinner or bedtime |
| Access | Some locations may not be open early | More locations may be available later |
| Preparation | Requires early dressing and travel | Allows more preparation during the day |
| Background | Depends on coastline direction | Depends on coastline direction |
| Main drawback | Very early start | Crowds or end-of-day fatigue |
Photographers in different destinations reach different preferences because coastlines, access, weather, and client routines differ. One location-specific comparison notes that the quality of sunrise and sunset light can be similar while the visible background, crowd level, and family schedule differ substantially. It also shows why advice from one side of an island or coastline should not automatically be applied to another (see the location-dependent comparison).
Put the family routine ahead of idealized light
A beautiful time on paper is a poor choice if a toddler will miss a reliable nap, a baby normally feeds then, an older relative cannot manage a pre-dawn start, or the family cannot realistically dress and travel on schedule.
Work backward from established routines:
- Identify meals, naps, medication routines, bedtimes, and realistic wake-up times.
- Eliminate windows that would predictably make key participants uncomfortable.
- Compare the remaining windows with the light and access at the selected beach.
- Choose the least disruptive workable option, even if it is not the photographer’s default.
- If neither sunrise nor sunset works, discuss a different location or time instead of assuming that midday will produce an equivalent result.
Some photographers report better morning cooperation from young children, but that is anecdotal. A child who wakes slowly, becomes hungry early, or has had sleep disrupted by travel may be happier later.
Check which way the coast faces
Do not assume every beach has an ocean-facing sunset. Depending on the coastline, the sun may rise over the water, set over the water, pass behind the camera, or disappear behind land, trees, buildings, or cliffs.
A reliable sun-position tool can help, but a local photographer familiar with the exact location may be better able to explain what will appear in the frame. Verify the selected beach and date rather than applying advice from another island, region, or coast.
Allow enough time to reach the photography area and settle the family. Published practitioner schedules vary substantially—from short local windows to sessions beginning roughly an hour before sunset—which is precisely why “start 45 minutes before sunset” should not be treated as a universal formula. Ask for an exact meeting and shooting time based on the selected beach, date, group size, and planned images.
Build Coordinated Outfits Without Making Everyone Match
Start with one garment that somebody genuinely likes wearing. It might be a patterned dress, textured shirt, child’s favorite smart outfit, or neutral jumpsuit. Draw two or three colors from that item and distribute them across the rest of the family.
For example, a print containing cream, soft blue, and taupe might lead to:
- A cream shirt with taupe trousers
- A light-blue dress
- A textured neutral knit
- A child’s patterned outfit containing two shared colors
- Denim or chambray as a related blue element
The goal is repetition without duplication. If every person wears the same white shirt and trousers, the group can appear uniform. If white appears in one shirt, another person’s pattern, and a third person’s layer, it creates continuity without making everyone look identical.
Starting with one inspiration garment and coordinating rather than matching are recurring recommendations in photographer styling guides. These remain aesthetic suggestions, not objective standards (see one photographer’s outfit-planning method).
Adaptable palette formulas
There is no objectively best beach palette, but these combinations offer easy starting points:
- Soft coastal neutrals: Cream, taupe, soft grey, and light blue
- Crisp coastal colors: Navy, light blue, and white
- Neutral with an accent: Cream, tan, and grey with restrained coral, green, or blue
- Tonal variation: Several shades of blue balanced by two neutrals
- Warm natural palette: Ivory, muted brown, sand, and subdued green
Color names are imprecise. One household’s “light blue” may be icy blue, while another chooses bright turquoise. Share a phone photograph, swatch, or simple visual reference when several households are dressing independently.
Use texture to add variety
Texture creates visual separation without requiring another pattern. Linen, cotton, denim, chambray, gauze, and knits can all add variety. You do not need every fabric in one photograph; two or three textures are enough.
Keep pattern scale under control. One noticeable print can serve as the inspiration garment. A second subtle stripe or small pattern may complement it, while several bold prints may compete for attention.
Photographer guides often advise limiting prominent logos, graphic text, character shirts, neon colors, and numerous competing patterns. Treat that as styling advice, not a rule. A graphic shirt may be appropriate when it represents the person or the playful story the family wants to record.
Match the clothes to the intended story
A water-oriented family outing and a polished portrait create different results.
For a playful session centered on sand, shell collecting, or permitted water play, swimwear, casual clothing, and cover-ups may fit the story. For a more formal portrait intended for a large print, structured trousers, dresses, collared shirts, or similarly dressy garments create a different tone.
Neither approach is inherently better. Decide which story you want before buying clothing.
Whatever the level of formality, prioritize:
- Comfort and reliable fit
- Freedom to walk, bend, hold a child, or sit if desired
- Expected temperature and wind
- Personal identity and preferred coverage
- Individual mobility and sensory needs
- Garments that will not require constant adjustment
- Clothing appropriate for the planned distance from sand and water
Flowing garments and bare feet are optional aesthetic choices, not requirements. Loose fabric may move attractively but can become difficult to manage in strong wind. Bare feet will not suit every person, surface, or temperature. Choose clothing and footwear for the actual location and participant.
For long hair, consider a secured style, clips, pins, or ties. The goal is not to eliminate movement but to reduce the number of frames in which faces are hidden.
Do a packing preview
Lay every outfit together in natural light and take a phone photo. Look for:
- One outfit much brighter or darker than the others
- Whites that clash because some are cool and others creamy
- Too many competing patterns
- One dominant neon or saturated color
- Accidental duplication
- Missing layers, shoes, or accessories
- Clothing at a noticeably different level of formality
The photograph also becomes a useful packing reference when clothing is distributed across multiple households.
Use a Short Shot List Instead of Improvising Every Grouping
A shot list works best when it is prioritized. A list of every theoretically possible combination can consume the session with regrouping, while a concise list protects the relationships that matter most.
Share it with the photographer or camera operator beforehand. Mark every entry as:
- Essential: The session would feel incomplete without it.
- Optional: Capture it if time, light, and attention allow.
For a large or multigenerational family, an efficient order is:
- Full family
- Grandparents or older relatives with the complete family
- All children or grandchildren
- Individual household units
- Couples
- Siblings
- Parents with adult children
- Selected candid or relationship-specific combinations
Photograph the full group, babies, and toddlers early. The complete portrait is usually the most complicated to assemble, while young children may have less patience later. A large-family guide based on a 16-person DIY session similarly recommends photographing everyone first, keeping household units together, assigning an organizer, and moving from priority combinations to optional frames (see the large-group workflow).
Arrange a large group with structure
Keep members of each household near one another within the larger portrait. This creates recognizable subgroups and makes the arrangement easier to build.
Avoid automatically placing everyone in one long, flat line. Where suitable for the participants and location, vary heights with standing and seated positions, place shorter people forward, or arrange the group in a shallow arc. Nobody needs to adopt an uncomfortable position merely to create visual variety.
Ask one family member who knows everyone to serve as organizer. That person can:
- Call people by name
- Assemble the next combination while the current one is photographed
- Check off completed frames
- Confirm that no requested household or relationship was missed
- Locate someone who has stepped away
The photographer or camera operator can direct the composition, while the organizer handles family identities and the checklist.
After the organized full-group portrait, make one playful version. Try a close group hug, a shared look toward the children, a gentle lean inward, or one coordinated movement. The organized version provides a dependable record; the playful one adds personality.
Copyable family beach photo shot list
Replace the brackets with names so nobody has to interpret generic labels on the sand.
Essential portraits
- [ ] Full group: [all names or household surnames]
- [ ] Full group with everyone looking toward the camera
- [ ] Playful full group: [hug, shared laugh, or movement]
- [ ] Grandparent(s) or older relative(s): [names] with everyone
- [ ] All children or grandchildren: [names]
- [ ] Household 1: [names]
- [ ] Household 2: [names]
- [ ] Household 3: [names]
- [ ] Baby or toddler with parent(s): [names]
- [ ] Priority relationship: [names and relationship]
Optional portraits
- [ ] Couple: [names]
- [ ] Siblings: [names]
- [ ] Parent(s) with adult children: [names]
- [ ] Grandparent(s) with grandchildren: [names]
- [ ] Cousins: [names]
- [ ] Individual child portraits: [names]
- [ ] Walking full group
- [ ] Candid play or family activity
- [ ] Environmental wide frame
- [ ] Silhouette or reflection if conditions allow
Organizer
- Name:
- Phone:
- Person responsible for checklist:
- Person responsible for children’s supplies:
Keep the essential portion short enough to complete before attention, weather, or light changes.
Mix Organized Portraits With Simple Movement Prompts
Begin with one clear portrait in which the family faces the camera. This is especially important for a large group: once people disperse into activities, rebuilding the complete arrangement takes time.
After securing that frame, move from poses to prompts. A pose tells everyone where to place each hand and foot; a prompt gives the family a simple action that creates interaction.
Useful low-complexity prompts include:
- Walk together
- Hold hands
- Cuddle or lean inward
- Search for shells
- Dance
- Build part of a sandcastle
- Pass or gently play with a beach ball
- Have children move a few steps toward their parents
- Look at the youngest child
- Tell one another something funny
- Watch the water together
Walking, dancing, cuddling, shell searching, baby snuggles, and compact “squish” arrangements all appear in one photographer’s activity-based pose guide (see the illustrated prompt collection).
Repeat simple actions with small changes
Ask the family to walk in one direction and then return. The reverse pass changes which faces are visible, how people space themselves, and how the wind affects hair and clothing. Capture several frames during each pass instead of expecting one perfectly synchronized step.
For a compact composition, try a close embrace:
- Bring shoulders closer together than feels natural.
- Have adults hold or gather around younger children.
- Capture one camera-facing version.
- Ask everyone to look at the children or one another.
- Prompt a gentle squeeze or shared laugh.
For a child-focused frame, place the children prominently while the adults interact with one another or respond to what the children are doing. Not everyone needs to stare into the lens. This keeps the children visually central without separating the family.
Include quiet and environmental frames
Movement need not fill the entire gallery. Look for quieter details:
- Footprints in the sand
- Linked hands while walking
- A child holding a shell
- Wet-sand reflections
- The horizon and open sky
- A wide frame showing the family within the landscape
- Reflections near the water when the location and conditions permit
- A silhouette when the light and camera operator’s skill support it
Silhouettes and bright-sky exposures can be technically demanding. Treat them as optional rather than sacrificing an essential family portrait to obtain one.
If sitting in the sand is uncomfortable, impractical, or unwanted, use standing embraces, walking, dancing, or a blanket-based portrait. Sitting is only one compositional option.
Any prompt near the water must be adapted to the participants and current conditions. Follow posted warnings and instructions from the applicable beach authority. If running, jumping, splashing, a prop, an animal, or another activity is not clearly appropriate and permitted, choose a simple dry-ground alternative. This photography guide cannot determine whether a specific activity or location is safe or allowed on a given day.
The goal is variety, not nonstop posing: one or two structured portraits, several interactive frames, and a few environmental details.
Keep Babies, Toddlers, and Older Children Engaged
Plan around the children you have, not imaginary children who enjoy prolonged formal portraits. Choose a time when young children are normally awake, fed, and reasonably comfortable. Avoid a predictable nap or meal conflict where possible.
Feed children beforehand and keep water, simple snacks, spare clothes, and a familiar toy or comfort item nearby. These supplies address ordinary needs but cannot guarantee cooperation. Photographer planning guides commonly include snacks, water, spare clothing, layers, a blanket, and a familiar activity among the practical items to bring (see one family-session packing guide).
Sequence matters. Capture the full family and the most important child portraits first. Do not save the only requested photograph of grandparents with a toddler until the end.
Use short, visible tasks
“You need to behave for pictures” is abstract and open-ended. Give children a small task with a clear finish:
- Stand beside your parent for one picture.
- Walk to that visible point and back.
- Find one shell.
- Give your grandparent a hug.
- Hold hands until you reach the blanket.
- Move a few steps toward your parent.
- Look at the camera while the photographer counts to three.
Alternate organized tasks with movement. A simple rhythm is:
- One quick camera-facing frame
- One walking or play prompt
- One close family interaction
- A brief reset or drink
- The next essential grouping
Humor, songs, familiar games, and family rituals can become prompts. A toddler may respond to a song, while an older child may prefer a challenge, joke, or meaningful activity. Adapt the approach to age and personality rather than using one tactic for everyone.
Spontaneous behavior is not automatically a failed pose. A child examining the sand, hiding against a parent, laughing at a sibling, or wandering briefly out of the arrangement may create a useful candid frame. The camera operator can record the moment and then calmly rebuild the essential portrait.
Keep babies supported
Center the baby’s portion of the session on ordinary caregiver-held portraits and close family contact rather than making the plan depend on an independent pose. Options include:
- Baby held against a caregiver’s chest
- Caregivers gathered closely around the baby
- A caregiver holding the baby while seated in an appropriate place
- Siblings gathered near a baby held by a caregiver
- Close details of hands, feet, or expressions
Caregivers should use their own judgment and normal support practices. A calm portrait can succeed even when the baby does not look directly at the camera.
Some photographers report that early morning works well for young children, but that observation is not universal. The child’s established routine should determine whether sunrise is genuinely workable.
Take Your Own Photos With a Phone, Tripod, or Remote
There are two practical DIY routes:
- A smartphone on a stable tripod, using a timer, repeated timer, interval feature, compatible remote, or interval app.
- A camera on a tripod, using a compatible timer or remote trigger.
Neither route removes the need to test the setup.
Smartphone workflow
Before arranging the family:
- Clean the lens with a suitable soft cloth.
- Turn on grid lines.
- Mount the phone securely according to the equipment instructions.
- Level the horizon.
- Compose slightly wider than the intended final crop.
- Tap the principal face or central part of the group to focus.
- Lock focus and exposure if the device supports it.
- Adjust brightness conservatively.
- Start burst, interval, or repeated-timer shooting.
- Join the group and repeat the sequence several times.
Avoid digital zoom. Reposition the supported device or change the composition instead when practical. Leave extra space around a large group so moving arms, feet, or heads are not clipped.
Burst, interval, and repeated-timer shooting increase the number of frames from which to choose, which can help when people blink or move. Controls vary by device, so practice finding focus, exposure, timer, and burst functions before the session.
Camera and remote workflow
Assemble the complete system indoors before traveling:
- Camera
- Charged battery and spare, if available
- Memory card
- Tripod
- Compatible remote or trigger
- Any required cable or receiver
- Equipment towel or sand barrier
- Lens-cleaning supplies
Test the trigger from the distance you expect to use. Confirm that an activation takes the intended number of frames and that the camera does not return to an unwanted timer or focus mode.
At the beach, follow the equipment manufacturer’s setup instructions and keep loose sand away from joints, mounts, and open compartments. Position the system only where it complies with posted instructions and will not obstruct other people.
Use family members as stand-ins while the operator establishes framing, focus, and exposure. Mark the intended group position with a blanket, footprints, or an easily described visual point. Once the operator joins the group, take multiple frames rather than trusting a single activation.
No one lens, aperture, ISO, or camera-to-subject distance works for every family. Group depth, available light, camera design, lens choice, and background all affect the appropriate settings. Use equipment and settings you have already tested.
Moving cold camera equipment from air conditioning into warm, humid air can lead to condensation. One photographer’s DIY tutorial recommends allowing the equipment time to acclimate when fogging occurs or is likely rather than trying to begin immediately (see the equipment precautions and setup).
Review before dismantling
Enlarge several photographs and check:
- Are the nearest and farthest faces acceptably focused?
- Are faces too dark?
- Is the sky or water excessively bright?
- Is the horizon level?
- Is anyone cropped out?
- Did the timer or remote work as expected?
- Are all essential family members present?
- Did you complete the priority shot list?
DIY family beach photos become more difficult as the group grows, light changes, children move, and equipment operation becomes uncertain. Preparation, repeated frames, and a concise shot list matter more than elaborate gear.
Use a Backup Plan for Wind, Crowds, Bright Backgrounds, and Weather
Create the backup plan before everyone is dressed. Make the first suitable vacation day your preferred session date and preserve another possible date instead of waiting until the final evening.
During scouting, identify a second area with a practical advantage: a cleaner background, shorter walk, simpler meeting point, less exposed position, or more workable camera angle. Confirm that the area is currently available for the intended use rather than assuming it is accessible.
When the beach is crowded
An empty background may not be realistic. Instead:
- Turn the group toward a cleaner angle
- Use a tighter composition
- Adjust the camera height
- Wait briefly for a gap
- Bring the family closer together
- Emphasize close interactions
- Use open water or sky behind the group
- Accept a few distant people as part of the setting
Avoid spending the entire session waiting for perfection. A strong family interaction can matter more than a completely vacant horizon.
When it is windy
Secure long hair where desired, simplify loose accessories, and keep spare layers nearby. Choose prompts that do not require fabric and hair to remain perfectly still. Walking, embracing, and turning toward one another can make wind-driven movement look intentional.
If a garment repeatedly obscures a face or restricts movement, adjust it or use a suitable spare layer. This is one reason to evaluate complete outfits together rather than considering each garment in isolation.
When people are squinting or faces are dark
Bright sky and reflective water can produce dark faces, an excessively bright background, or both. When possible, change the time, direction, or composition instead of trying to force the original setup.
Try another camera angle, turn the group away from direct glare, or choose a frame containing less bright sky. During changing sunrise or sunset light, take several exposures because the balance between faces and background can shift quickly.
If neither sunrise nor sunset is practical, ask the photographer about another location or time suited to the family. Do not assume that a midday beach session will produce an equivalent appearance.
When sand, spray, or play changes the plan
Bring spare clothes for young children and keep a towel or blanket available. Capture the polished portrait before introducing an activity likely to wet or soil clothing.
If the location, weather, participants, or equipment no longer support the plan, use the rescheduling or cancellation arrangement agreed upon in advance. A planned photograph is not a reason to disregard posted instructions or continue when the family needs to stop.
Condensed day-of checklist
- [ ] Confirm the exact time and meeting point
- [ ] Check current conditions and local access information
- [ ] Account for children’s meals, naps, and bedtime
- [ ] Pack outfits, water, snacks, layers, hair controls, spare clothes, and a blanket
- [ ] Charge and test the phone, camera, tripod, and remote
- [ ] Leave enough time for travel, parking, and walking
- [ ] Photograph the full group and young children first
- [ ] Complete essential combinations before optional ideas
- [ ] Add movement and environmental frames
- [ ] Review focus, exposure, framing, and attendance before leaving
- [ ] Preserve the backup date until the session is complete
Family Beach Photos FAQ
What colors are commonly recommended for family beach photos?
Photographer guides often suggest coordinated neutrals, blues, and soft coastal colors rather than identical outfits. Useful starting points include cream, taupe, soft grey, and light blue; navy, light blue, and white; or neutral garments with one restrained accent.
These are styling formulas, not rules. Comfort, fit, identity, temperature, and desired formality should come first. Begin with one inspiration garment, choose two or three colors from it, and repeat them across different garments and textures.
How long before sunset should family beach photos begin?
There is no universal start time. Published photographer practices range from short windows near sunset to sessions beginning roughly an hour beforehand, depending on location and approach.
Ask for an exact arrival and shooting time for the selected beach and date. Account separately for parking, walking, and assembling the group. A large multigenerational family may require more organizational time than a family of four.
What poses work well for a large or multigenerational family?
Start with a camera-facing full-group portrait. Keep household units together and vary heights where comfortable rather than automatically arranging everyone in one long line.
Then move through older relatives with the full family, all children, individual households, couples, siblings, and parents with adult children. Finish the organized sequence with a close embrace, shared laugh, or simple walk. A designated family organizer can call names and prepare the next group.
Can we take good family beach photos with a smartphone?
Yes. Use a stable support, clean the lens, enable grid lines, level the horizon, focus on the central group, and lock focus and exposure where the phone supports those controls. Avoid digital zoom and use burst, interval, or repeated-timer shooting.
Test the process beforehand and review the images before leaving. Large groups, moving children, wind, and changing light make preparation and a short shot list particularly important.
Where can I find stock family beach photos instead of arranging a session?
For readers seeking existing imagery rather than planning a portrait session, searchable collections are available through Getty Images’ large-family beach gallery and the Pexels family beach search. These collections may also provide visual inspiration for groupings, walks, silhouettes, and candid activities.
Search results, availability, sponsored content, and usage terms can change. Before using an image, verify the current terms directly with the platform and review the information attached to that specific asset; appearance in a search collection does not by itself establish how the image may be used.
The order of operations is straightforward: select a realistic date and light window, scout the location, preserve a backup option, coordinate comfortable outfits, and write a short priority list. Photograph the full group and young children first, then use simple movement to create variety. There is no universally perfect palette, pose, or sunrise-versus-sunset answer. The most workable plan is the one that fits the particular family, beach, date, and conditions.