
How to Plan the Climb Up Grouse Mountain—and Get Back Down
The route covers about 2.5 km, gains 800 m over 2,830 stairs, and prohibits downhill hiking, so plan a separate permitted descent.
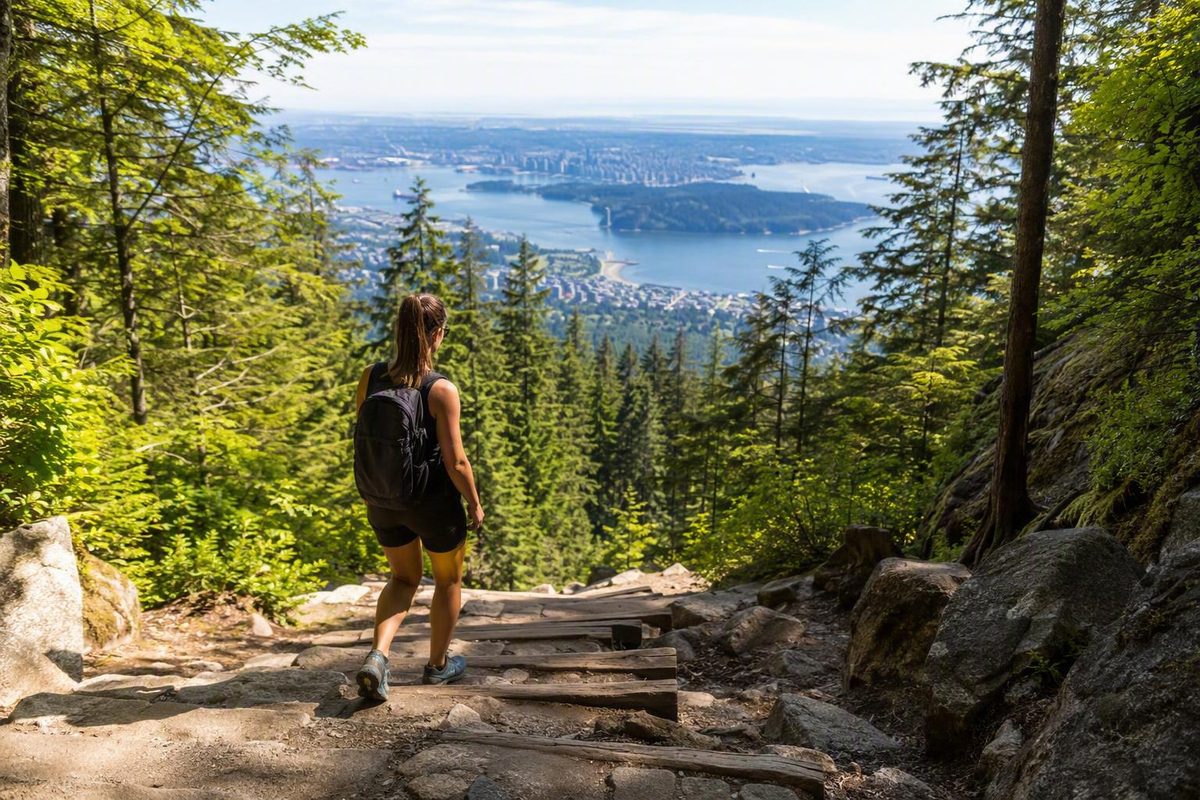
Grouse Grind at a Glance: What to Know Before You Go
The Grouse Grind in North Vancouver is a difficult, continuously steep, one-way uphill trail in Grouse Mountain Regional Park. Its short distance can look manageable on a map, but the route is better understood as a sustained mountain stair workout than as a casual walk.
Related: Choose North Shore Hikes by Terrain and Time.
Use approximately 2.5 kilometres, 800 metres of elevation gain, and 2,830 stairs as the official planning baseline. Downhill hiking on the Grouse Grind is prohibited, so reaching the summit area does not complete your plan: every hiker needs a separate, permitted way down. Grouse Mountain publishes these figures and explains the download requirement on its official Grouse Grind page.
Most of the ascent is enclosed by forest. Expect physical effort, close-up forest terrain, and long sequences of steps rather than a succession of panoramic viewpoints. The principal views and visitor facilities are around the summit area, and clouds may obscure the view even after a successful climb.
Separate stable route facts from details that can change.
The basic character of the Grouse Grind—short, steep, uphill-only, and physically demanding—is relatively stable. The following are not:
- Whether the trail is open
- Daily trail-access hours
- Weather, fire, or maintenance restrictions
- Gondola operating status
- The final available download
- Download-ticket prices and purchase procedures
- Parking rates, restrictions, and time limits
- Transit schedules
- Seasonal shuttle availability
Do not copy an old itinerary without checking those details again.
Pre-departure checklist
Before leaving your accommodation:
- Check Metro Vancouver’s Grouse Grind page for current trail status, access hours, closures, fire conditions, and park rules.
- Check Grouse Mountain separately for current Red Skyride and Blue Grouse Gondola operations, mountain conditions, the final available download, and the current download-ticket price.
- Read both the base and summit forecasts. Conditions can differ substantially with elevation.
- Confirm your descent. Decide whether you intend to use a gondola or, if officially open and suitable, hike down the separate BCMC Route.
- Recheck transportation. Verify transit departures or current parking conditions.
- Make the go/no-go decision before entering the one-way trail. If timing, weather, health, equipment, or the descent plan is doubtful at the base, do not start.
Grouse Mountain attraction hours are not necessarily the same as Grouse Grind trail-access hours. A resort page showing evening activity does not prove that hikers may enter the Grind at that time. Likewise, an open trail does not establish that every gondola or attraction is operating. Treat the regional-park trail and the mountain operator as two separate operational checks.
Is the Grouse Grind Hard Enough to Rethink Your Plan?
The Grouse Grind is officially rated difficult, and that rating should shape your decision. The challenge comes from gaining roughly 800 vertical metres in about 2.5 kilometres with no flat sections. Even if you routinely walk several kilometres around a city, that experience does not reproduce continuous uphill stair climbing.
The movement is repetitive but not uniform. You will climb wooden steps and move over rocks, roots, bridges, and irregular natural surfaces. Narrow sections may also limit where you can pause or pass.
Think about readiness in practical terms rather than asking only whether you are generally “fit.”
A useful readiness check includes whether you can:
- Climb stairs continuously for an extended period
- Sustain hard cardiovascular effort without becoming disoriented or unsteady
- Recover while continuing to move slowly uphill
- Handle high and uneven steps without relying on a handrail
- Carry enough water, a snack, and weather layers
- Stay attentive to footing when tired
- Complete the descent you have selected
- Remain within the day’s access, daylight, weather, and transportation limits
A person may be active and still find the Grind overwhelming.
Health considerations matter as much as training. Metro Vancouver specifically cautions people with high blood pressure, heart problems, asthma, or other relevant health issues when deciding whether to attempt the trail. Its official safety guidance also emphasizes changing mountain conditions and the route’s demanding character. If you are uncertain whether sustained strenuous exercise is suitable for you, seek appropriate medical advice before the hike.
Being capable of reaching the summit does not necessarily mean the complete outing will be safe or enjoyable. A first-time hiker who finishes the ascent exhausted may have little capacity left for a rugged hiking descent. Assess the climb and the return separately.
Families should make the same individual assessment for each child. Reports that other children have completed the route do not establish that it suits a particular child. Consider sustained stair-climbing ability, comfort on uneven terrain, current weather, and whether the child can continue safely when tired. Adults must also decide before entry how the group will respond if someone struggles after committing to the one-way climb.
If you are uncertain about your health, fitness, equipment, available time, or the day’s conditions, choose another mountain experience. The Grouse Grind is not a compulsory Vancouver achievement. Visitors primarily seeking views may be happier using mountain transportation or selecting a route designed around scenery rather than an intense fitness challenge.
Distance, Elevation, Stairs, and a Realistic Time Budget
For planning, use the official baseline below:
| Route measure | Official planning baseline |
|---|---|
| One-way uphill distance | About 2.5 km |
| Elevation gain | About 800 m |
| Stairs | 2,830 |
| Planning time for hikers with good fitness | About 2 to 2.5 hours |
Some third-party guides publish measurements closer to 2.9 kilometres and 853 metres of elevation gain. They do not change the central planning fact: nearly all of the route is steeply uphill. The Vancouver Trails route guide, for example, uses the higher figures while still rating the route difficult.
Metro Vancouver’s approximate two-to-2.5-hour estimate for hikers with a good fitness level is the more conservative official planning reference. Other guides cite faster averages, while self-selected Tripadvisor reviewers report individual times ranging from approximately one to four hours. Those anecdotal completion times demonstrate variation; they do not establish a typical or promised pace.
Avoid building the day around an athletic acquaintance’s time.
Useful planning bands—not guarantees—are:
- Highly fit, experienced climbers: may finish faster than the official estimate but should still preserve time for delays and descent.
- Regularly active first-timers: should keep a generous buffer rather than assuming their normal walking or gym pace will transfer directly.
- Occasional hikers or stair-climbing novices: may need longer than published estimates and should reconsider whether the route is appropriate.
- Groups: generally move according to the member who needs the most time, not the fastest person.
For a first attempt, reserving 2.5 to three hours for the ascent and breaks is a useful editorial scheduling allowance, not an official prediction. Its purpose is to reduce pressure to rush.
More importantly, ascent time is not total outing time. Add:
- Travel from your accommodation to Grouse Mountain
- Time to find the entrance and prepare at the base
- Waiting for companions
- The climb and rest stops
- Time to recover, change layers, or eat at the summit
- Optional summit time
- A gondola wait or approximately two additional hours for a BCMC descent
- Travel back from the mountain
A sample first-timer framework might look like this:
| Outing component | Example allowance |
|---|---|
| Travel to Grouse Mountain | Based on live transit or traffic |
| Base preparation | Allow a personal buffer |
| Climb and breaks | 2.5–3 hours |
| Summit recovery or visit | Optional; fit it around descent constraints |
| Descent | Gondola wait and ride, or about 2 hours on BCMC |
| Return transportation | Based on live service or traffic |
Only the published route and descent estimates are official planning figures. Preparation and summit buffers are personal scheduling choices.
This turns a seemingly short hike into a substantial half-day or longer outing. Choose your start by working backward from the trail’s closing time, available daylight, forecast, final gondola, and return transportation—not merely from your preferred ascent speed. If you plan to descend on foot, daylight and weather margins become even more important. If you plan to download, leave room for a slower climb and possible waiting time at the summit.
What the Climb Feels Like, From the Trailhead to the Top
The trail entrance is beside and just east of the Grouse Mountain gondola base at the top of Nancy Greene Way. Look for the designated Grouse Grind entrance rather than assuming that any nearby uphill trail is the correct route.
The opening forest terrain quickly establishes the pattern: climb, step up, find stable footing, and repeat. The route combines wooden stairs with roots, rocks, bridges, and narrow natural sections. Wooden structures cover substantial portions of the path, in part to manage erosion associated with heavy use.
Do not picture a uniform staircase. Step height and surface can change abruptly. A sequence of constructed stairs may lead into rough soil or rock, then back to roots or another set of steps. Wet wood and stone require particular care.
There are two marker systems first-time hikers may confuse:
- Large quarter markers show broad progress through the climb.
- Numbered markers run from 1/40 through 40/40.
The quarter signs should not be interpreted as four stages of equal walking distance, equal duration, or equal effort. A first-person guide explains that they represent quarters of elevation rather than simple quarters of distance. That helps explain why the first quarter can feel surprisingly long and why reaching halfway does not mean the remaining work will feel easier.
Route descriptions differ slightly on the hardest portion. Vancouver Trails identifies the third quarter as the steepest, while another guide describes both the second and third quarters as the steepest. The useful conclusion is not that one exact quarter is objectively worst; it is that the middle-to-upper climb remains sustained and demanding. Do not spend all your energy trying to reach the halfway sign quickly.
The mountain facilities may seem close, but fatigue can make mistakes more likely. Continue watching your foot placement rather than accelerating toward the finish. Explore Magazine’s route description describes the nearly continuous ascent, numbered sections, forest terrain, and rougher rocks near the top.
Trees limit views during much of the climb. The forest can be attractive, but the Grind is not built around frequent open overlooks. Save expectations of broad views for the summit area.
A steady effort is more useful than competitive pacing. Start slowly enough to maintain control over your breathing and foot placement. Pause only where you can do so without obstructing a narrow section, and let faster hikers pass when there is safe space. Do not feel pressured to match someone who knows the route or is treating it as a timed workout.
Likewise, avoid weaving aggressively around slower hikers. Crowding changes the safe pace, especially where the steps narrow or the surface is uneven. Finishing a few minutes sooner is not worth a collision or misstep.
Safety, Weather, Gear, and On-Trail Facilities
Pack for a steep mountain climb, not for a short urban walk.
Carry or wear:
- Adequate water for sustained exertion
- A snack
- Shoes with a secure fit and reliable grip
- Weather-appropriate layers
- Rain protection when conditions warrant it
- A charged cellphone
- A headlamp or flashlight if the schedule could approach darkness
- Any personal medication or health supplies you normally require
Footwear matters because the surface combines stairs, roots, rocks, wet wood, and uneven ground. A shoe that feels comfortable on pavement may not hold securely on loose soil or angled rock. The goal is not a particular label or style; it is grip, stability, and a fit that remains secure during thousands of uphill steps.
Do not assume warm weather in Vancouver means warm conditions at the summit. Metro Vancouver advises that the summit can be approximately 10°C cooler than the base, and snow or freezing temperatures can occur higher on the mountain even when conditions below feel mild. Heavy rain, high winds, winter hazards, spring maintenance, fire conditions, and other safety concerns can also cause closures. Check both forecasts shortly before departure and carry layers for the colder location.
A closed gate or official closure is not an invitation to make your own assessment. Do not enter when the trail is closed.
There are no toilets on the Grouse Grind itself, and dogs are prohibited. Metro Vancouver publishes those trail rules. Washrooms are reported near the gondola base and in the summit guest-services area, so use the base facilities before starting rather than assuming amenities will be available partway up.
Metro Vancouver may install automated external defibrillators at selected numbered markers while the trail is open, but the equipment is removed seasonally. Their possible presence is not a substitute for health screening, suitable preparation, or emergency planning, and you should not assume that an AED is currently installed or accessible.
If you develop symptoms of serious illness or suffer a significant injury after entering the trail, stop, seek assistance, and contact emergency services. Follow instructions from park staff or emergency responders. Do not interpret general “turn back” hiking advice as permission to descend the one-way Grouse Grind.
Fatigue, worsening weather, and insufficient time do not make downhill travel on the Grind acceptable. At the summit, use a permitted descent rather than improvising a return on the uphill trail. The safest opportunity to abandon a doubtful plan is before passing the one-way entrance.
Getting to the Grouse Grind Without a Car—or With One
The destination is the Grouse Mountain base at 6400 Nancy Greene Way in the District of North Vancouver. The Grouse Grind entrance is beside and east of the gondola base.
From downtown Vancouver without a car, the standard route is:
- Travel to Waterfront Station.
- Take the SeaBus across Burrard Inlet to Lonsdale Quay.
- Transfer to bus 236 for Grouse Mountain.
- At the mountain base, locate the designated trail entrance east of the gondola facilities.
Bus 232 from Phibbs Exchange is another documented connection. Grouse Mountain lists both routes, along with the SeaBus connection, driving directions, paid-parking policy, and seasonal shuttle information on its getting-here and parking page.
Verify the route, departure time, fare, and transfer details with TransLink before leaving. Service patterns can change, and late-day frequency or connections may differ from the outbound journey. Build waiting and transfer time into the day rather than treating the bus ride as an exact appointment.
For broader trip organization, Vancouver Know’s How to Experience Vancouver Without a Car can help you combine transit with walkable parts of the city. It is a general planning resource, not evidence for current Grouse Mountain routes or schedules.
If driving from downtown or the west side, a common approach is to cross Lions Gate Bridge, continue toward Marine Drive, and travel north on Capilano Road. From Highway 1, use the Capilano Road north exit and continue toward Grouse Mountain.
Do not rely on promotional estimates suggesting a fixed, very short drive from downtown. Bridge congestion, city traffic, road work, events, and parking circulation can change the trip substantially. Check live traffic and allow a buffer.
All parking lots at the Grouse Mountain base require payment, but rates, payment systems, time limits, and restrictions can change. Confirm the current rules rather than relying on a price quoted in an old review. If the parking period barely covers your expected climb, it probably does not cover preparation, summit time, descent, and delays.
A summer shuttle has also been offered from Canada Place under specified ticket-purchase conditions. It is seasonal rather than a permanent, unconditional service. Verify whether it is operating, what product must be purchased, where it departs, and whether the return schedule works for your hiking plan.
Whether arriving by transit or car, save your return arrangements before entering the trail. A transit rider should know the late-day connection, a driver should know the parking limit, and everyone should know how they intend to descend from the summit.
How to Get Down: Gondola Download vs. the BCMC Route
You may not hike down the Grouse Grind. It applies even if the trail appears quiet or descending stairs seems easy. Vancouver’s North Shore tourism organization explains the rule in its Grouse Grind overview.
There are two principal descent plans.
1. Download by gondola
The Red Skyride or Blue Grouse Gondola is the lower-effort option after the climb. A separate download ticket is required. Before setting out, verify:
- Which gondola system is operating
- The current download fare
- How and where to purchase a ticket
- Whether advance purchase is available or required
- The final downhill departure
- Any maintenance or weather disruption
Do not assume that a historical fare remains current. Also do not assume every mountain admission product or summit attraction is included because you arrived on foot. Confirm the operating and ticket details through Grouse Mountain before departure.
2. Hike down the separate BCMC Route
Metro Vancouver identifies the BCMC Route as a hiking descent when it is open and conditions are suitable. Its planning figure is approximately 2.9 kilometres and about two hours downhill. That is a substantial extension after an already strenuous ascent, not a quick shortcut.
The BCMC is steep and rugged, with roots, rocks, and irregular footing. A third-party BCMC route guide rates it hard and describes rougher, less constructed terrain than the Grind.
| Consideration | Gondola download | BCMC descent |
|---|---|---|
| Direct cost | Paid; verify the current fare | No gondola ticket, though other trip costs remain |
| Added time | Waiting plus ride time | Plan about two hours |
| Physical effort | Low relative to hiking down | High after the Grind ascent |
| Surface | Mechanized transport | Steep roots, rocks, and uneven trail |
| Weather exposure | Limited, although operations can be disrupted | Continued exposure throughout the descent |
| Daylight requirement | Reach the final operating departure | Allow daylight for a full rugged descent |
| Best fit | Hikers wanting the lower-effort return | Prepared hikers with sufficient time, energy, gear, and suitable conditions |
| Main uncertainty | Fare, queue, ticket process, and operating status | Trail status, conditions, pace, and fatigue |
Make the descent decision before starting the Grind. You can preserve flexibility by budgeting for a gondola ticket even if you hope to use the BCMC. A gondola is an alternative only if it is operating, tickets remain available under the current process, and you reach it before the final download.
At the summit, reassess rather than mechanically following the plan made earlier. Ask:
- Are my legs stable on steps?
- Can I control a steep descent for roughly two more hours?
- Is the BCMC officially open?
- Are the weather and trail conditions suitable?
- Is there enough daylight?
- Does everyone in the group still have water, layers, and energy?
- Is a gondola operating if we change plans?
Third-party sources conflict on BCMC seasonal patterns, snow conditions, pet rules, and other operational details. Do not choose whichever version is most convenient. Check the same-day official status.
Completing the Grouse Grind proves only that you reached the summit area. It does not prove that your legs, knees, concentration, equipment, or schedule are ready for another demanding two hours downhill.
Build the Whole Outing: Schedule, Cost, and Backup Decisions
Plan the Grouse Grind as a sequence of linked decisions rather than as one short hike.
A workable order is:
- Check official trail status, access hours, closures, and fire information.
- Check base and summit weather.
- Confirm gondola operations, the final download, and the current fare.
- Check BCMC status if you are considering a hiking descent.
- Verify transit or parking.
- Travel to Nancy Greene Way.
- Allow time for washrooms, gear adjustments, water, and a final readiness check.
- Enter only if the complete plan remains workable.
- Climb with a generous buffer.
- Reassess energy and conditions at the summit.
- Spend optional time at the summit only if it will not compromise the descent or return trip.
- Descend by the selected permitted method.
- Complete the return journey.
Build a cost framework instead of relying on an old total.
Possible costs include:
- Transit fares or paid parking
- A gondola download ticket
- Food and water
- Optional summit purchases
- Gear needed before the hike
The public trail and downhill transportation are separate planning questions. Walking uphill does not mean every summit product is included, and it does not eliminate the possible cost of getting down. Check the terms attached to any mountain admission, shuttle, attraction, or download product.
To choose a start time, begin with the latest constraint. That may be the trail closing time, sunset, deteriorating weather, the final gondola, the last convenient transit connection, or a parking limit. Then work backward:
- Add descent time.
- Add a queue or operating buffer.
- Add optional summit time.
- Add a slower-than-expected ascent.
- Add preparation at the base.
- Add travel to the trailhead.
If the resulting start time is earlier than you can manage, change the plan. Do not remove safety margins simply to preserve the hike.
An earlier start often creates more room for delays, weather changes, and daylight. One personal guide recommends early weekday visits to reduce heat and crowds, but that is practical anecdotal advice rather than a guarantee of an empty trail. Weather, holidays, events, and local workout patterns can still produce busy periods.
Use a pre-start decision gate. Do not enter if:
- The trail is closed
- Weather is deteriorating
- Essential gear is missing
- You do not have adequate water
- A member of the group is unwell
- The descent remains unresolved
- Available time is too tight
- You are relying on a gondola departure you may not reach
- You are counting on the BCMC without confirming its status
Use a second decision gate at the summit. Reassess energy, leg stability, daylight, weather, BCMC status, and gondola operation. A plan made at breakfast should not override what the mountain and your body are telling you several hours later.
Visitors who mainly want a high viewpoint or mountain atmosphere should consider another mountain-access experience or a route better suited to average hikers. Forcing the Grouse Grind into an itinerary can consume energy needed for the rest of a Vancouver trip, especially when the descent and return journey have been underestimated.
Save this compact checklist:
- [ ] Trail status and access hours checked
- [ ] Fire conditions and closures checked
- [ ] Base and summit weather checked
- [ ] Health and fitness assessed honestly
- [ ] Adequate water and a snack packed
- [ ] Layers and rain protection packed
- [ ] Charged phone carried
- [ ] Grippy footwear worn
- [ ] Headlamp packed if darkness is possible
- [ ] Start time calculated from the latest constraint
- [ ] Transit or parking verified
- [ ] Permitted descent selected
- [ ] Gondola fare, process, and final departure checked
- [ ] BCMC status checked if relevant
- [ ] Return schedule confirmed
Frequently Asked Questions
Is the Grouse Grind open today?
Trail status can change with weather, maintenance, seasonal hazards, fire conditions, and park operations. Use the official Metro Vancouver status check linked in the pre-departure checklist on the day of your hike. Do not infer that the trail is open from Grouse Mountain attraction hours, an old search result, or someone else’s recent trip.
How long does the Grouse Grind take for a first-time hiker?
The official planning estimate is approximately two to 2.5 hours for hikers with a good fitness level. A first-time visitor may find it sensible to reserve 2.5 to three hours for the climb and breaks, but that larger allowance is a planning buffer rather than a guaranteed completion time.
Remember that this is ascent time only. Add transportation, preparation at the base, summit time, the gondola wait or BCMC descent, and the return journey.
Can you walk down the Grouse Grind instead of taking the gondola?
No. Walking downhill on the Grouse Grind itself is prohibited. Permitted return choices include a paid gondola download or the separate BCMC Route when it is officially open and suitable for your ability and the conditions.
The BCMC is a steep, rugged descent rather than an easy equivalent of taking the gondola. Plan approximately two hours and reassess energy, weather, daylight, and trail status at the summit.
How much does it cost to get down from Grouse Mountain after hiking?
A gondola download requires a separate paid ticket, but the fare and purchase process can change. Check the operator before departure for the current price, operating status, purchase requirements, and final download.
A BCMC descent avoids the gondola ticket when the route is open and appropriate, but it adds substantial time and physical effort. Your complete budget may also include transit or parking, food, water, gear, and optional summit purchases.
Are dogs and toilets available on the Grouse Grind?
Dogs are prohibited on the Grouse Grind, and there are no toilets along the trail. Washrooms are reported near the gondola at the base and in the summit guest-services area. Use the base facilities before entering and confirm current park rules if they affect your plan.
A successful Grouse Grind day depends less on chasing a fast ascent than on making four sound decisions before leaving: confirm that the trail is open, assess your readiness honestly, carry suitable gear, and choose a lawful descent with enough time and energy remaining. Check Metro Vancouver for trail status and Grouse Mountain for current gondola details immediately before departure.